

Post by Frank Swarner on Aug 3, 2009 9:17:22 GMT -5
The Tartan is a nice, basic Dee fly that is a good one choose if you want to practice the basics.
Tartan (not the exact pattern....what's shown)
Hook: Daiichi - size 1 (really too short a shank for a Dee fly)
Tag: Flat tinsel - small - Gold
Tail: GP read breast feather fibers
Ribbing: Flat tinsel - large - gold
Body: rear half orange and front half scarlet
Throat: Teal
Hackle: Blue Eared Pheasant
Wings: Turkey
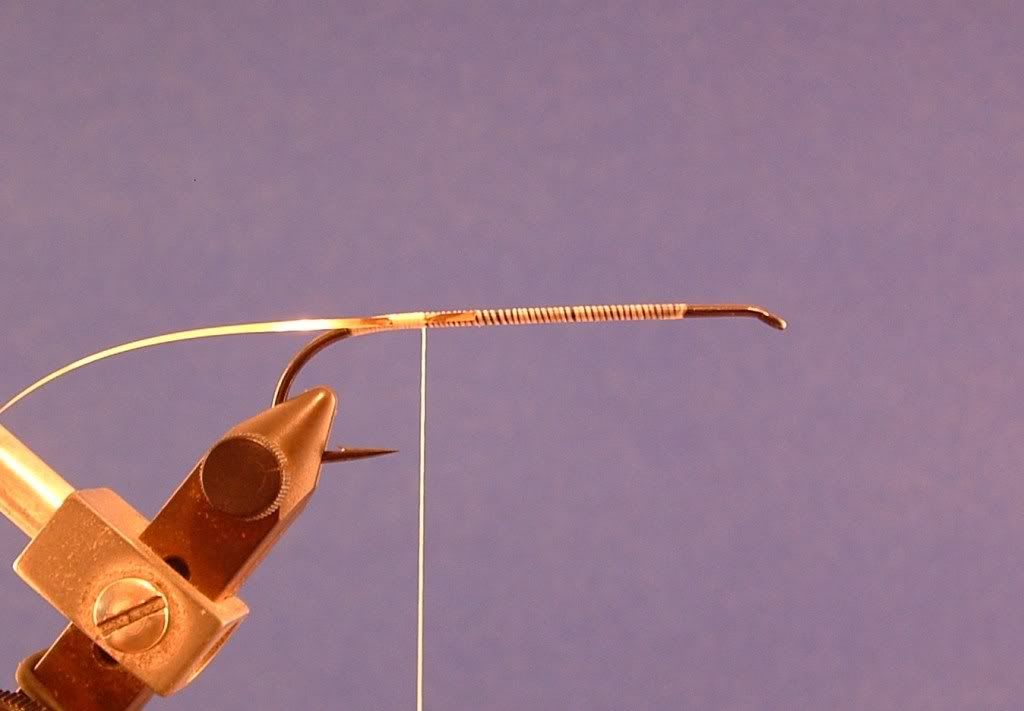 Attach thread to hook and provide a base for materials. I also provide a smooth base for the tinsel tag. That's my choice, the tag can be on the shank as well. Attach the tag material and wrap forward over the tag end.
 After wrapping the tag, unwrap your thread wraps to the next to last one, and tie in both tag ends. Excess can be left to help build the underbody.
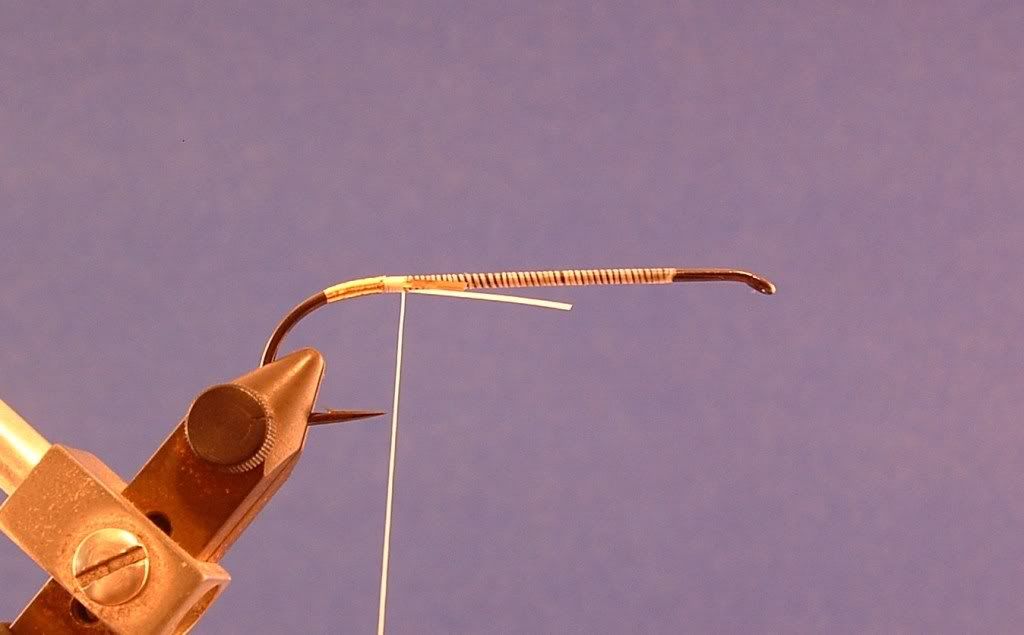
 Attach the tail of GP red breast feather fibers. They should extend slightly past the hook bend.
 Build up the underbody by wrapping back towards the tail with edge to edge wraps, flattening the thread.....stop 3-5 turns short of tail. I stop short of the tail because I do not want a lump to form in front of the tail. Wrap forward, continuing past the midoint of the shank and stop. Wrap back towards the tail and stop shorter than the previous layer, return forward and stop about 6 wraps short of the return wire.
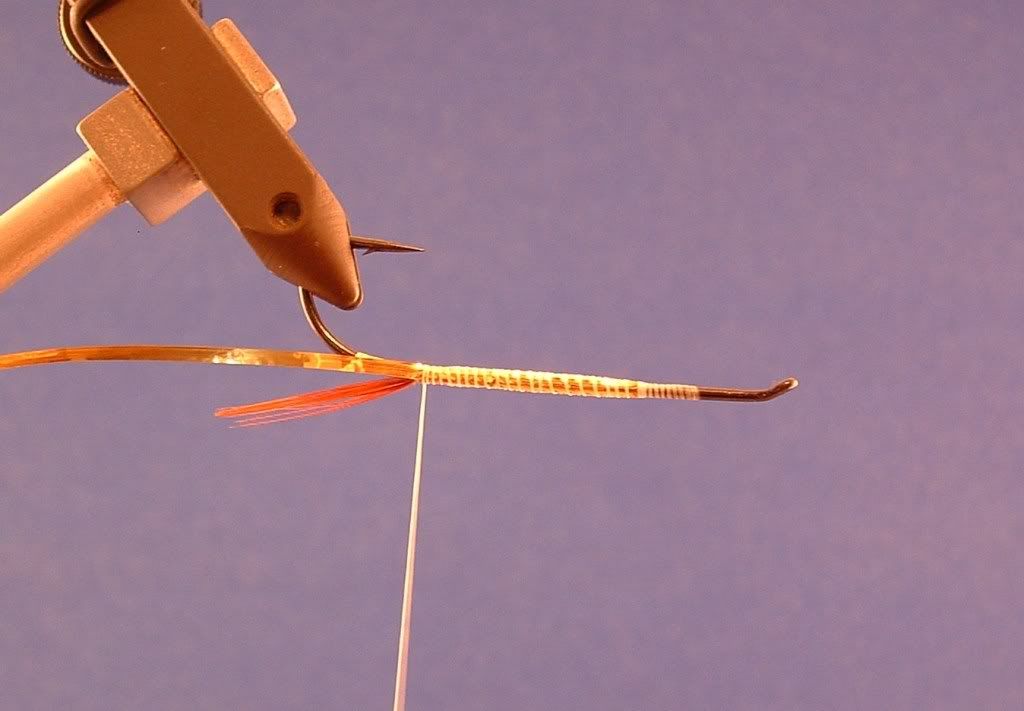 Attach the ribbing to the far side of the hook shank.
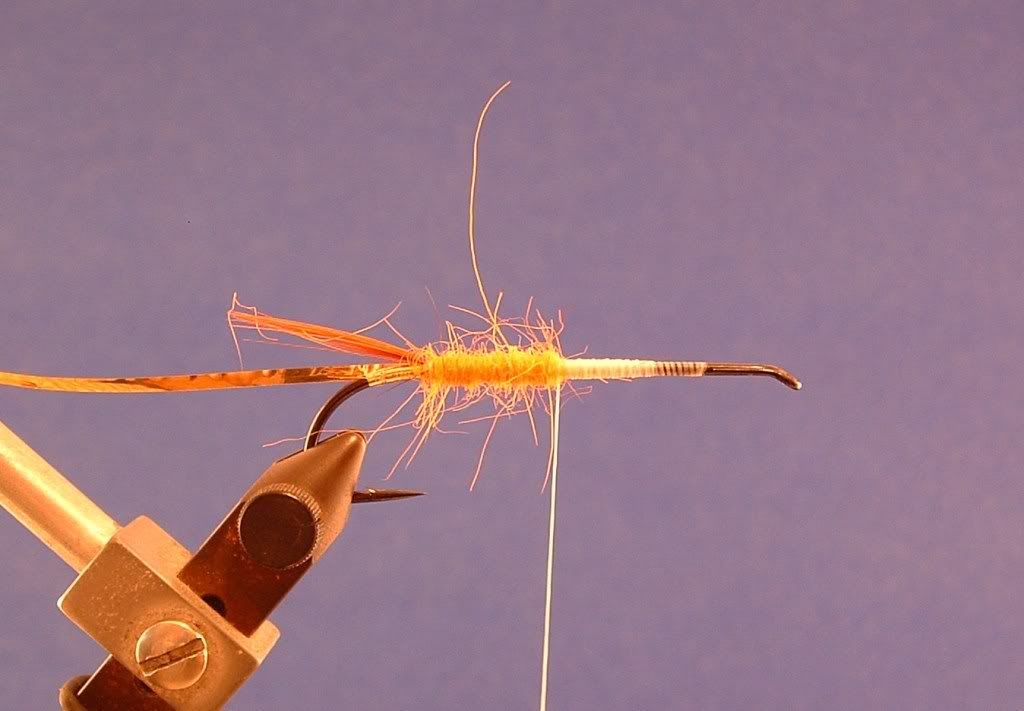
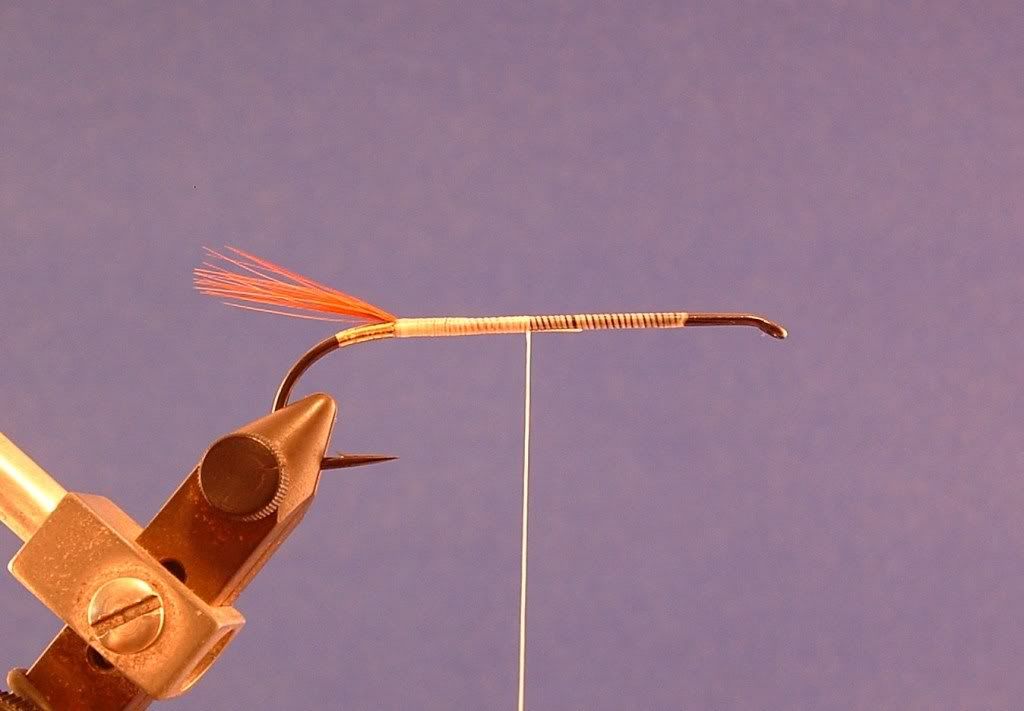
Dub the rear half of the body...I spun the dubbing onto the thread to keep the body thin.
 Attach the spey hackle to the underside of the hook shank.
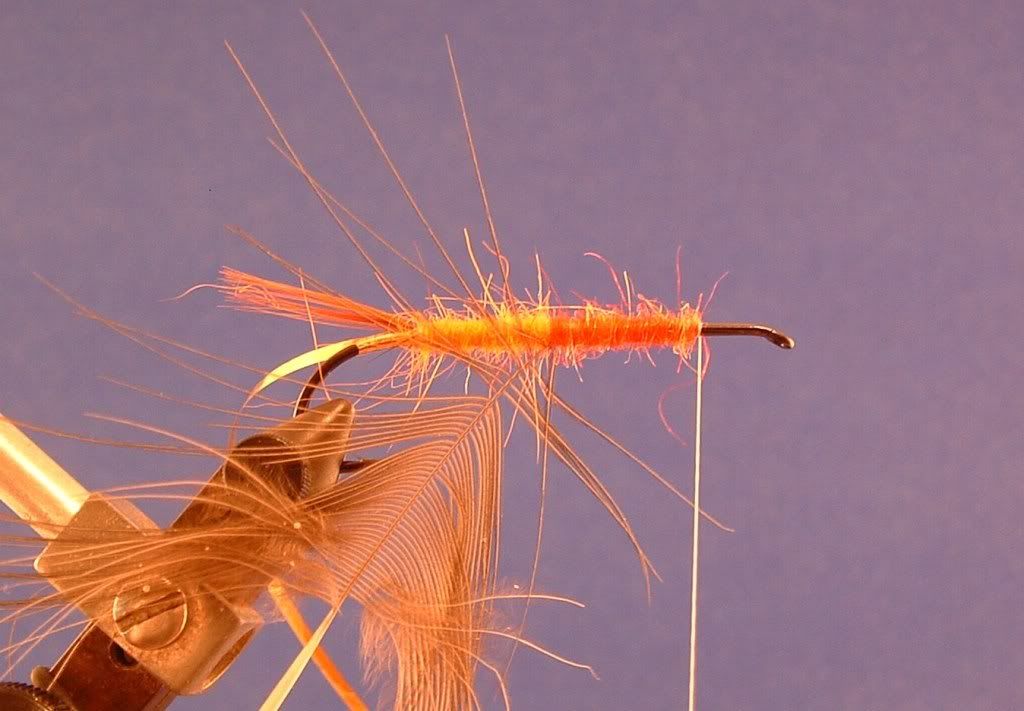
Dub the front half of the body...I spun the dubbing onto the thread to keep the body thin.
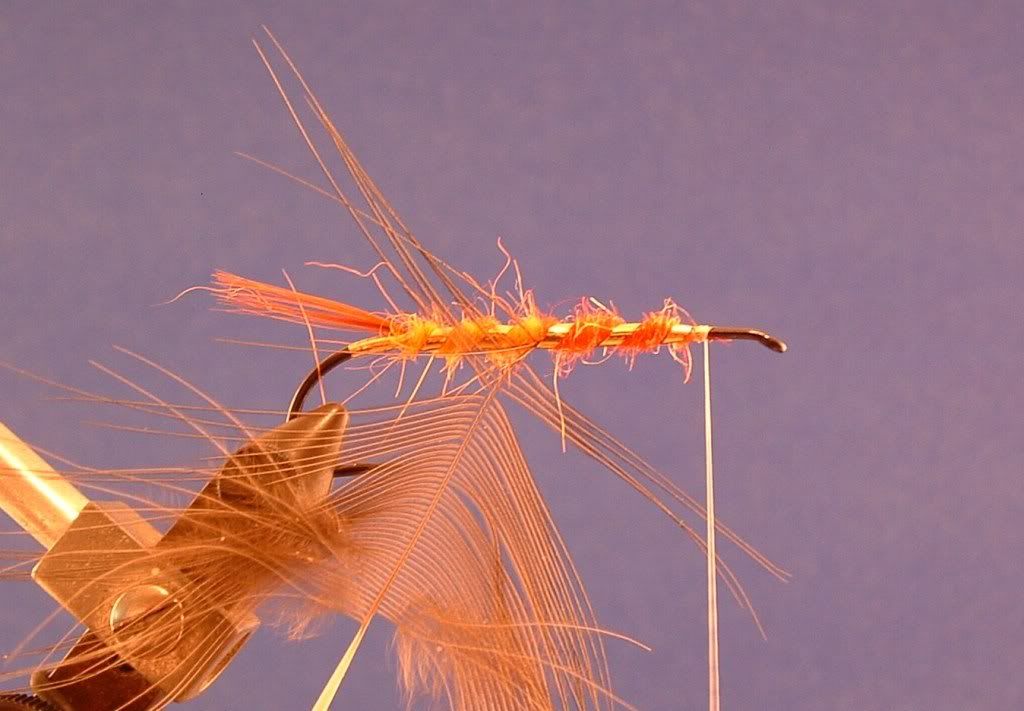 Rib the body with the flat tinsel, making sure the middle rib is just touching the front edge of the hackle tie in point. The wraps of hackle will follow the back edge of the flat tinsel rib. Tie the tinsel off at the front with 3-4 wraps and remember how many wraps you made.
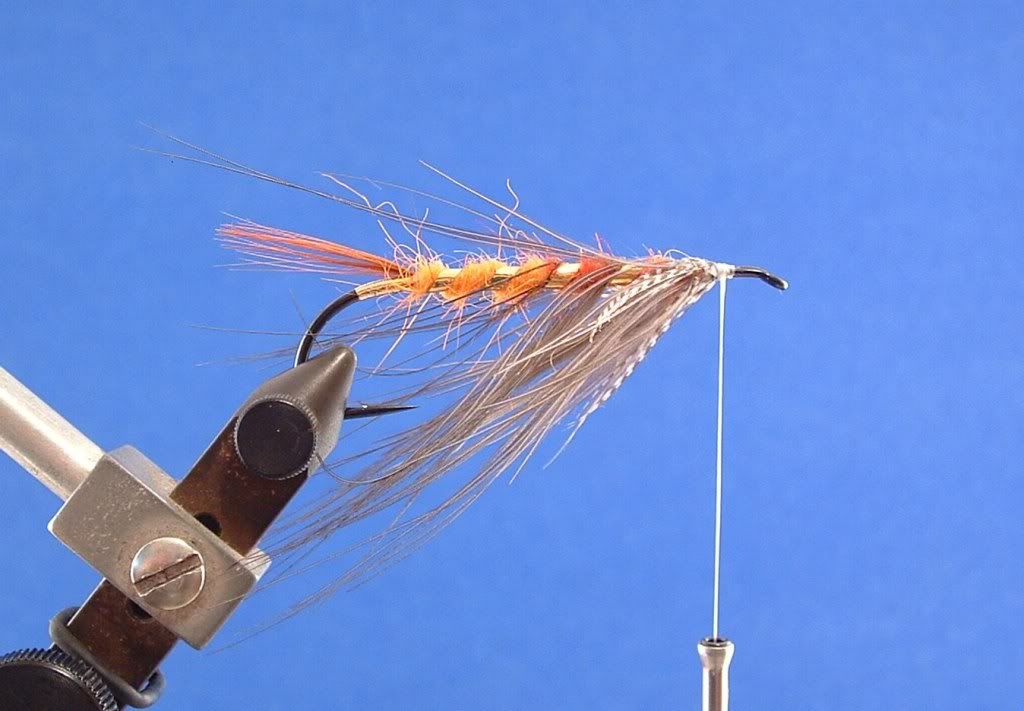
Wrap the hackle forward following the rear edge of the flat tinsel. Fold back the hackles as you move forward. Tie off the stem with 3-4 turns of thread.....remember the number of wraps!!
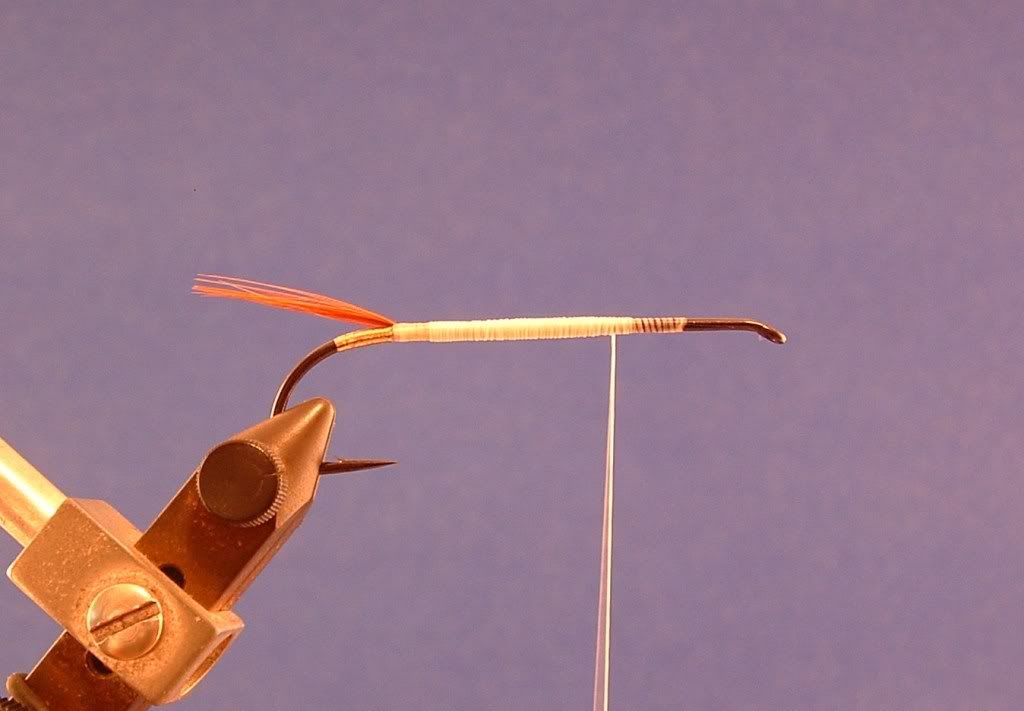
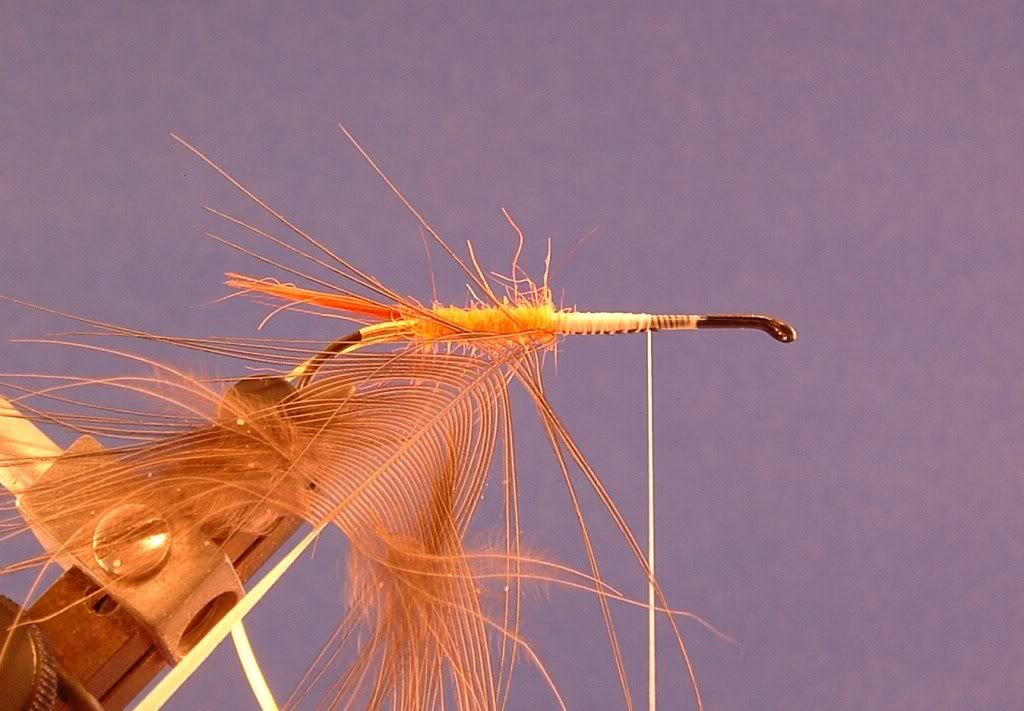
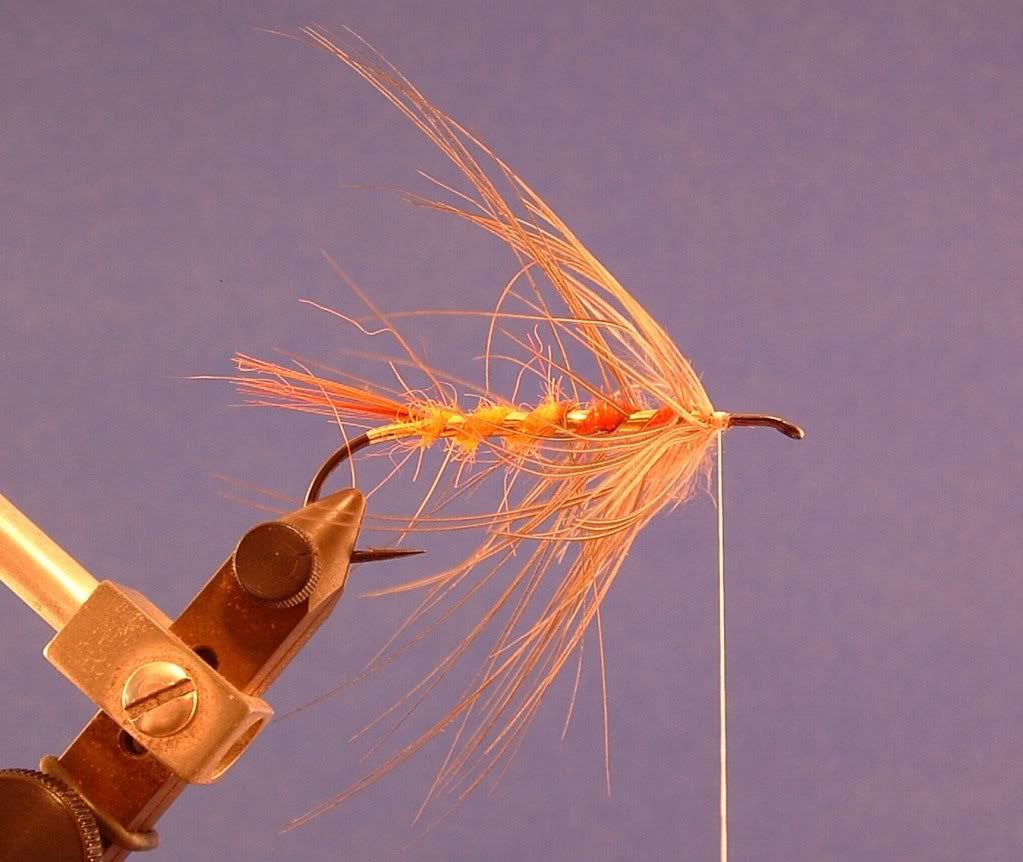
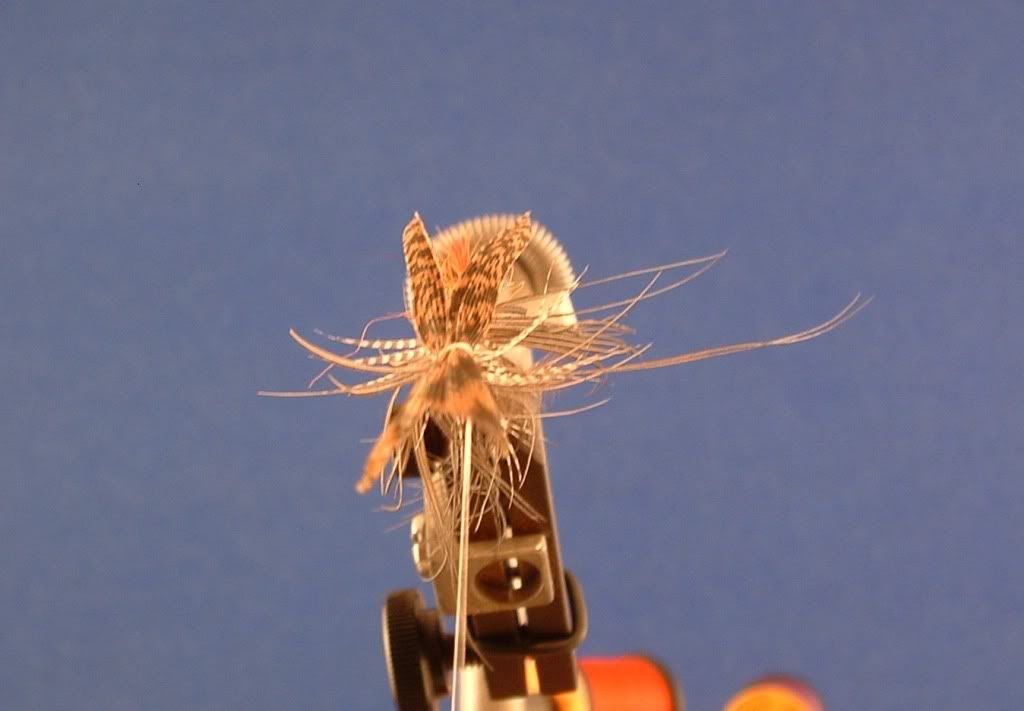
Try to part the fibers on top of the hook shank, fold them down and pinch them underneath the hook shank.
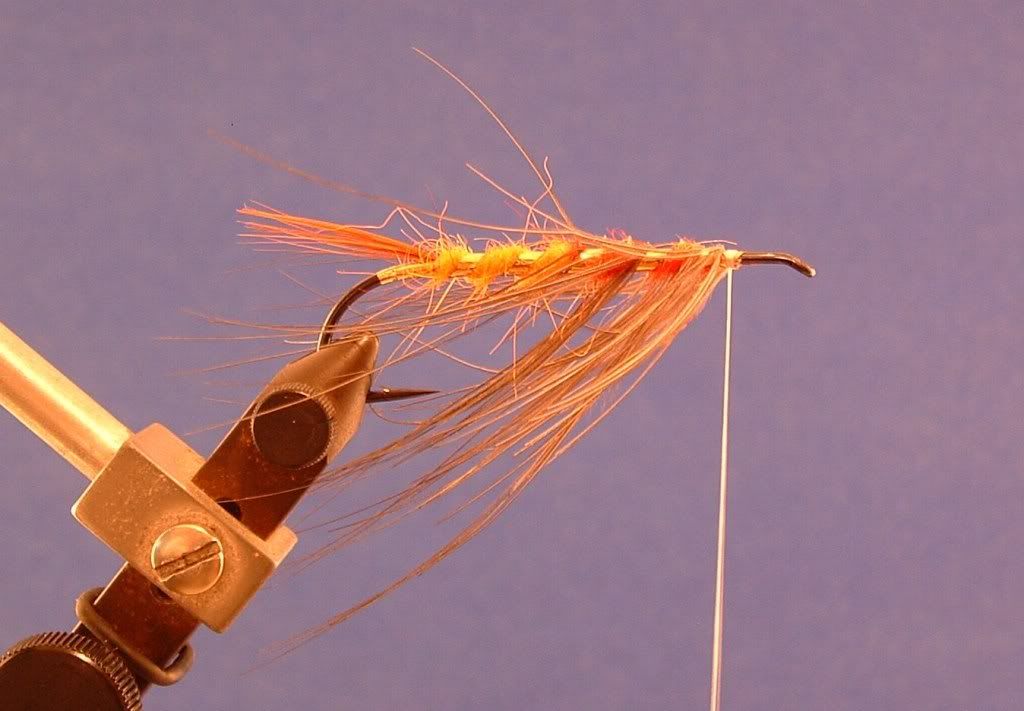
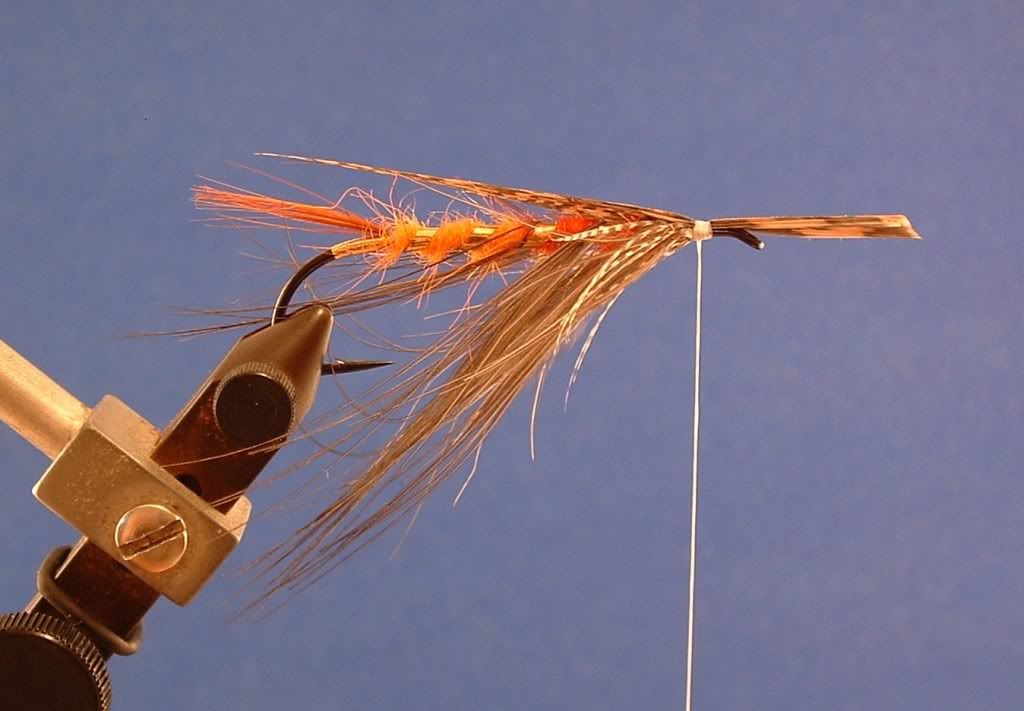
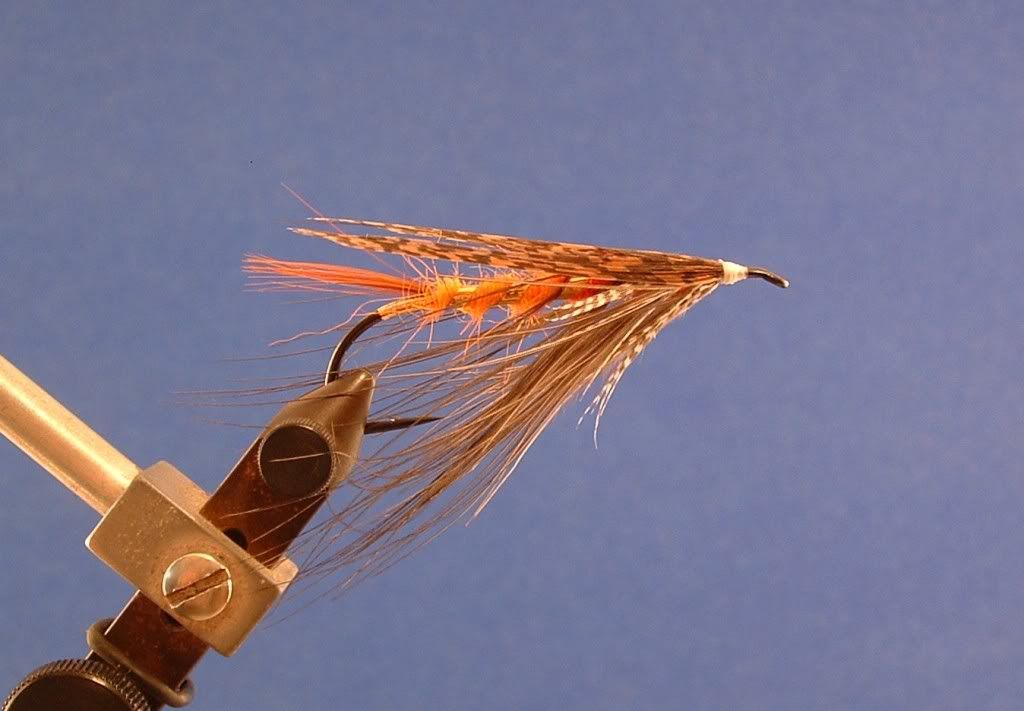
Hey a decent picture!! LOL Select the proper size teal feather for the throat and strip off one side. Unwrap 2-3 turns then tie the teal in by the tip and wrap. Fold down or trim the fibers on top of the hook shank so the won't interfere with the wings.
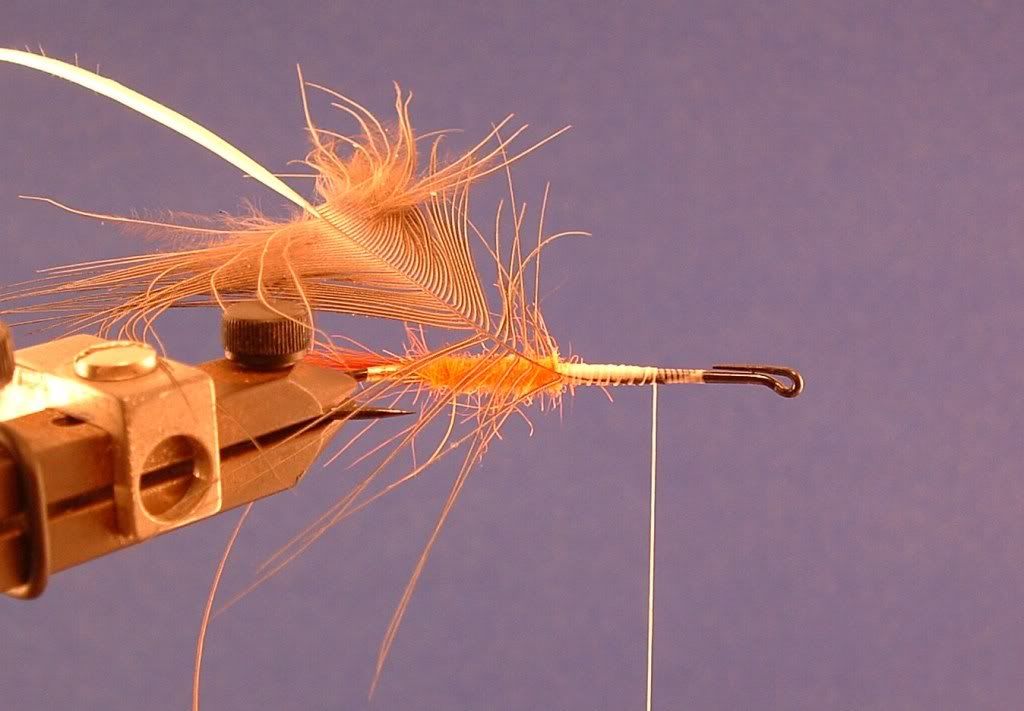
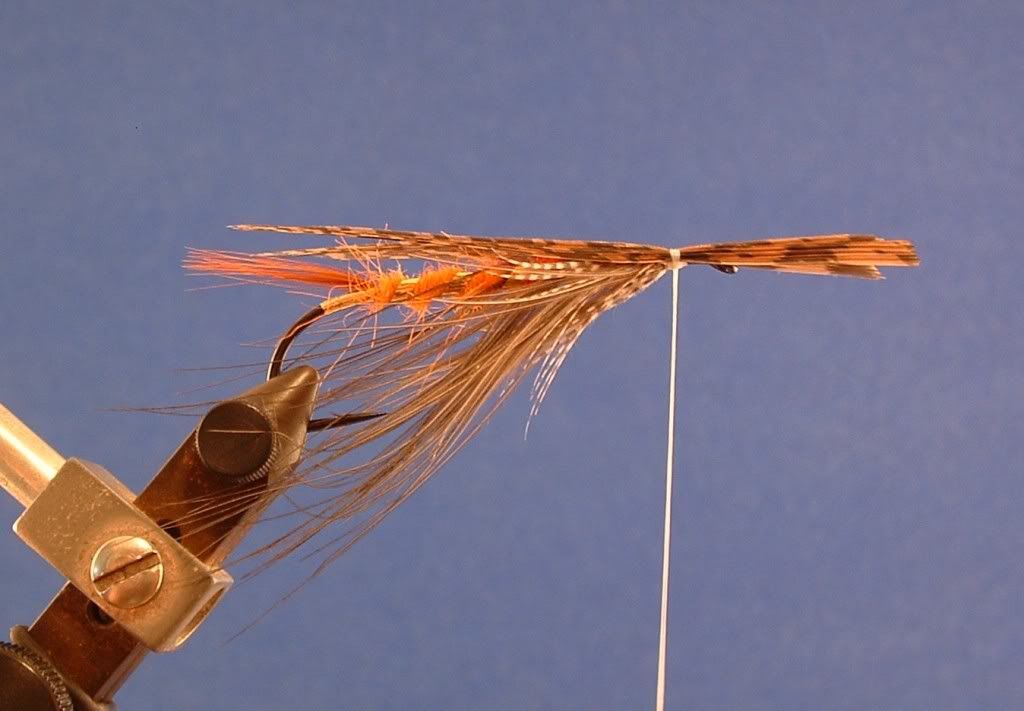
 Reverse the thread direction to attach the far or left wing. Select a strip of a about 10-15 Turkey fibers for the wing. While the fibers are still attached to the tail feather I run 1 tip of my pointy-est scissors along the stem and fibers to count each ridge (fiber). Snip the fibers off the stem and attach them to the hook shank so the wing are no longer than the bend of the hook. You want to try to compress the fibers from the outside towards the centerline of the hook shank horizontally rather vertically. 2 loose wraps with a little finger coaxing and 2 firm wraps should do the job. Reverse the thread postion back to normal for the near or right wing.
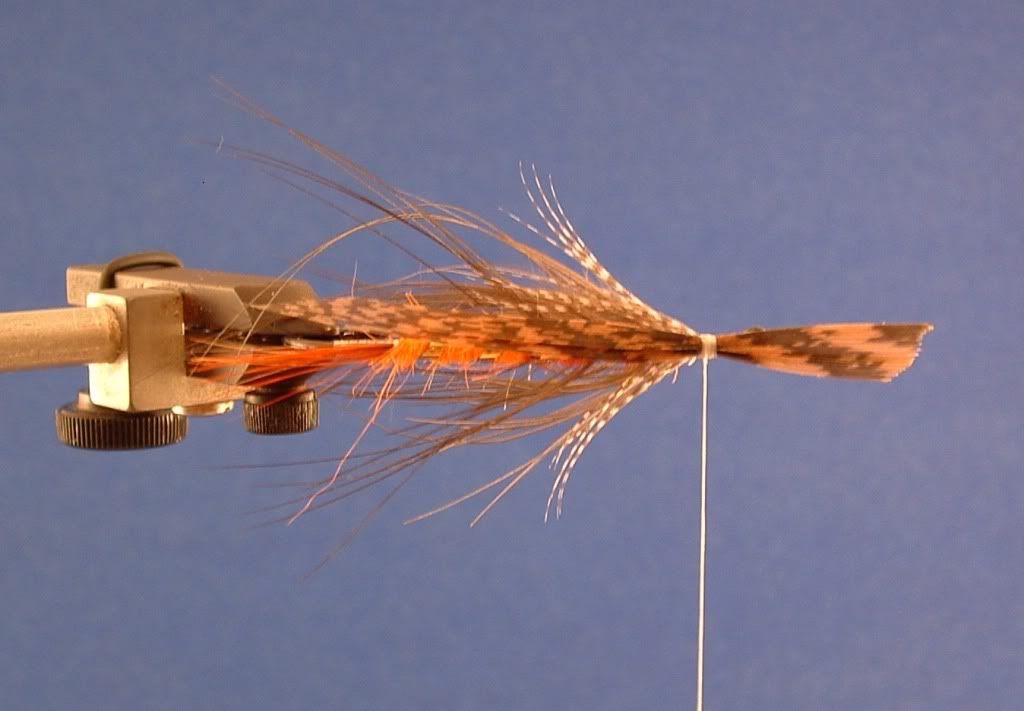
See the creases in the wings? That is not good......this is due to tying in the wings by the softer fibers and not the stiff butt fibers that will compress better and won't fold or roll as much.
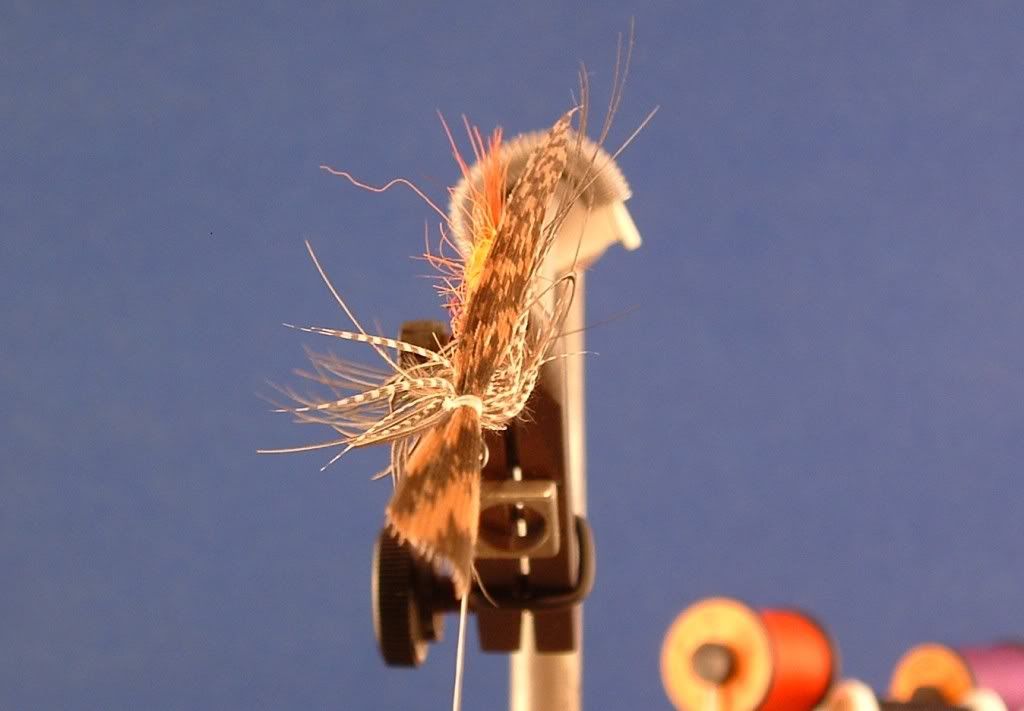
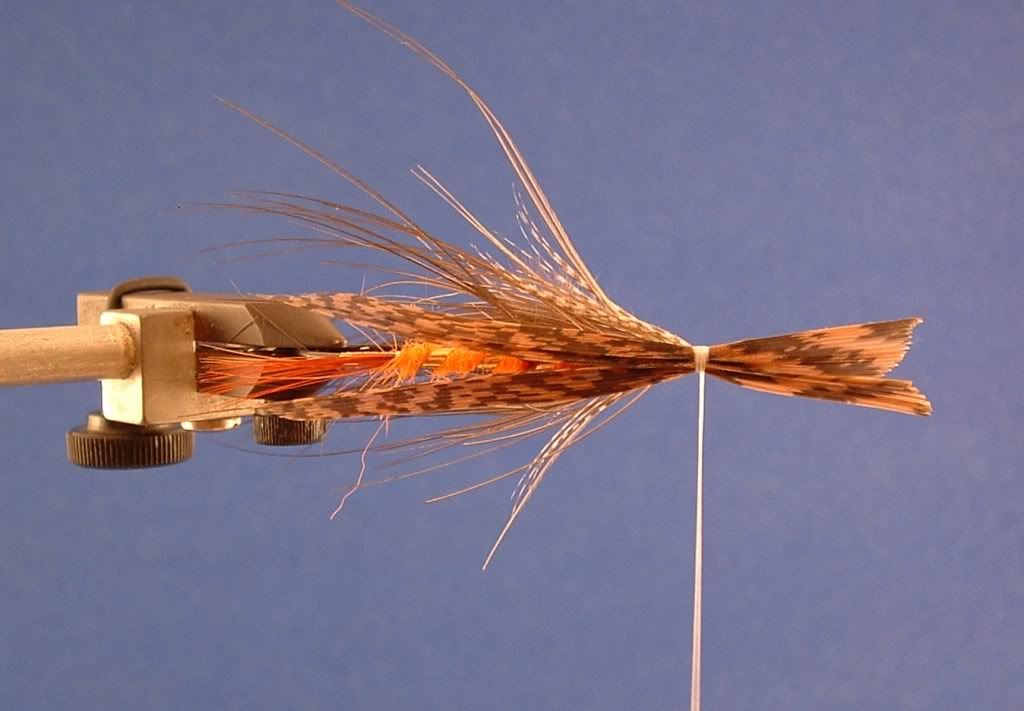
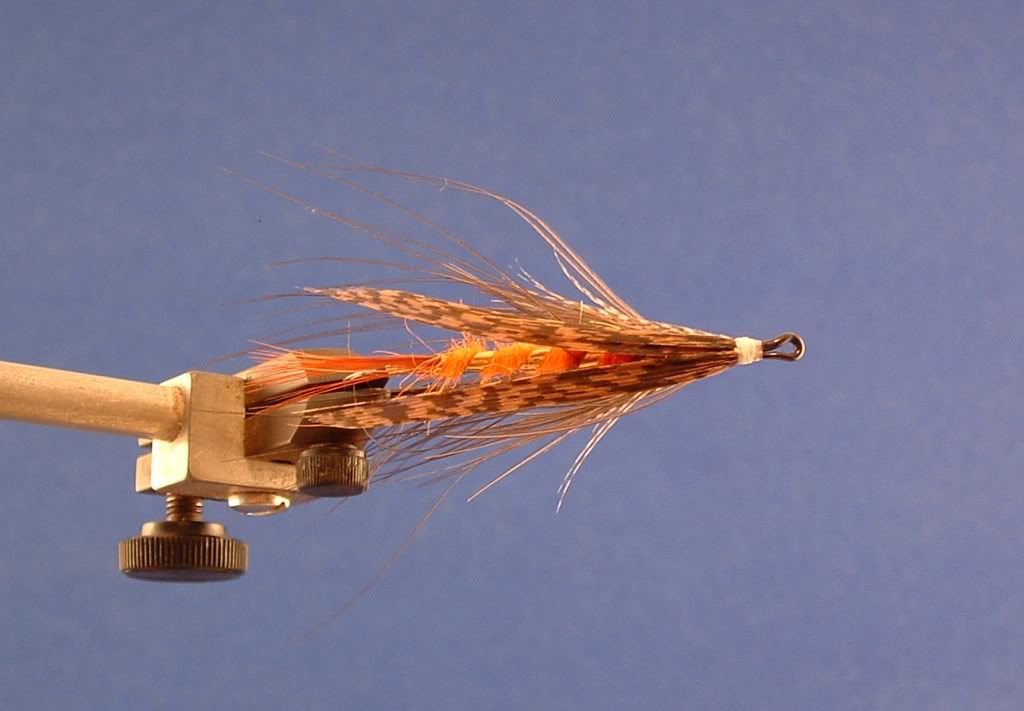
 Please notice how far the butts are extend past the eye of the hook. THIS WING IS TIED IN AT WRONG TIE IN SPOT. The perfect tie in spot for these wings is about 1/4" back from the very butt. The wing material for dee flies determines the length of hook/shank to be used.....not the other way around.
I equate tying in dee wings by the very butt of the fibers to tying in spey wings of Bronze mallard in by the butt or gray area of the fibers. YOU WILL HAVE MUCH BETTER SUCCESS!!
Tartan (not the exact pattern....what's shown)
Hook: Daiichi - size 1 (really too short a shank for a Dee fly)
Tag: Flat tinsel - small - Gold
Tail: GP read breast feather fibers
Ribbing: Flat tinsel - large - gold
Body: rear half orange and front half scarlet
Throat: Teal
Hackle: Blue Eared Pheasant
Wings: Turkey
Attach thread to hook and provide a base for materials. I also provide a smooth base for the tinsel tag. That's my choice, the tag can be on the shank as well. Attach the tag material and wrap forward over the tag end.After wrapping the tag, unwrap your thread wraps to the next to last one, and tie in both tag ends. Excess can be left to help build the underbody.Attach the tail of GP red breast feather fibers. They should extend slightly past the hook bend.Build up the underbody by wrapping back towards the tail with edge to edge wraps, flattening the thread.....stop 3-5 turns short of tail. I stop short of the tail because I do not want a lump to form in front of the tail. Wrap forward, continuing past the midoint of the shank and stop. Wrap back towards the tail and stop shorter than the previous layer, return forward and stop about 6 wraps short of the return wire.Attach the ribbing to the far side of the hook shank.Dub the rear half of the body...I spun the dubbing onto the thread to keep the body thin.
Attach the spey hackle to the underside of the hook shank.Dub the front half of the body...I spun the dubbing onto the thread to keep the body thin.
Rib the body with the flat tinsel, making sure the middle rib is just touching the front edge of the hackle tie in point. The wraps of hackle will follow the back edge of the flat tinsel rib. Tie the tinsel off at the front with 3-4 wraps and remember how many wraps you made.Wrap the hackle forward following the rear edge of the flat tinsel. Fold back the hackles as you move forward. Tie off the stem with 3-4 turns of thread.....remember the number of wraps!!
Try to part the fibers on top of the hook shank, fold them down and pinch them underneath the hook shank.
Hey a decent picture!! LOL Select the proper size teal feather for the throat and strip off one side. Unwrap 2-3 turns then tie the teal in by the tip and wrap. Fold down or trim the fibers on top of the hook shank so the won't interfere with the wings.
Reverse the thread direction to attach the far or left wing. Select a strip of a about 10-15 Turkey fibers for the wing. While the fibers are still attached to the tail feather I run 1 tip of my pointy-est scissors along the stem and fibers to count each ridge (fiber). Snip the fibers off the stem and attach them to the hook shank so the wing are no longer than the bend of the hook. You want to try to compress the fibers from the outside towards the centerline of the hook shank horizontally rather vertically. 2 loose wraps with a little finger coaxing and 2 firm wraps should do the job. Reverse the thread postion back to normal for the near or right wing.See the creases in the wings? That is not good......this is due to tying in the wings by the softer fibers and not the stiff butt fibers that will compress better and won't fold or roll as much.
Please notice how far the butts are extend past the eye of the hook. THIS WING IS TIED IN AT WRONG TIE IN SPOT. The perfect tie in spot for these wings is about 1/4" back from the very butt. The wing material for dee flies determines the length of hook/shank to be used.....not the other way around.I equate tying in dee wings by the very butt of the fibers to tying in spey wings of Bronze mallard in by the butt or gray area of the fibers. YOU WILL HAVE MUCH BETTER SUCCESS!!