Post by Frank Swarner on Nov 26, 2009 12:55:05 GMT -5
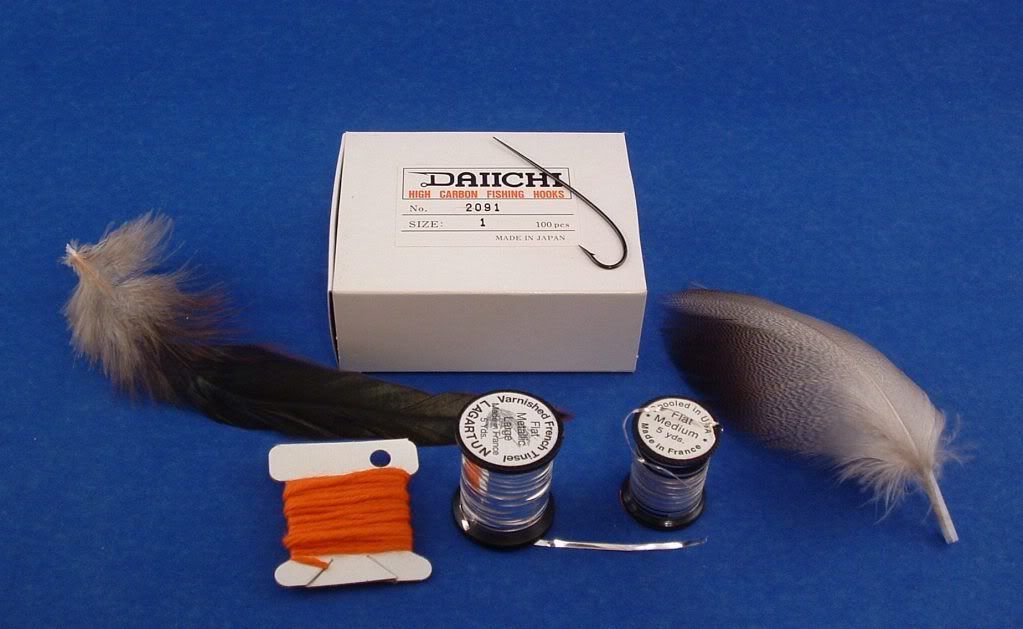
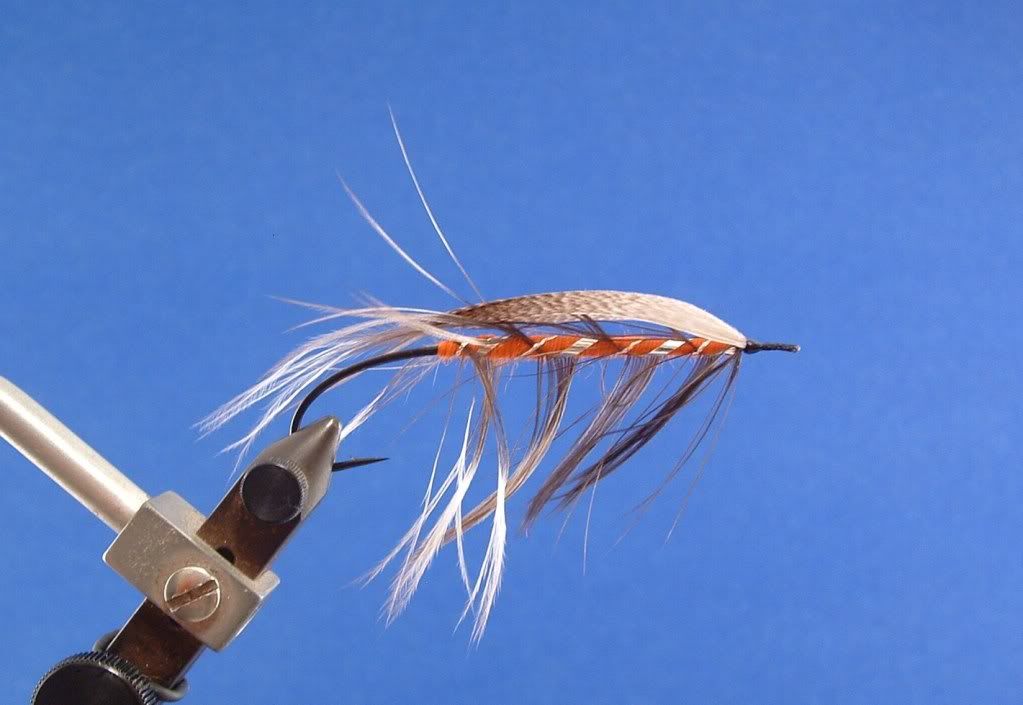
Hook: Alec Jackson 2091 size 1 blind eye
Eye: 30lb braided dacron backing lashed and glued
Body: Orange Berlin Wool
Hackle: Schappen Black
Ribbing #1: Small flat metal tinsel - silver
Ribbing #2: Large flat metal tinsel - silver
Wings: Bronze mallard
From A.E. Knox
Carron Fly - Body Orange, bars of silver tinsel. Hackle, Black feather from the breast of the heron. Wing, Mallard
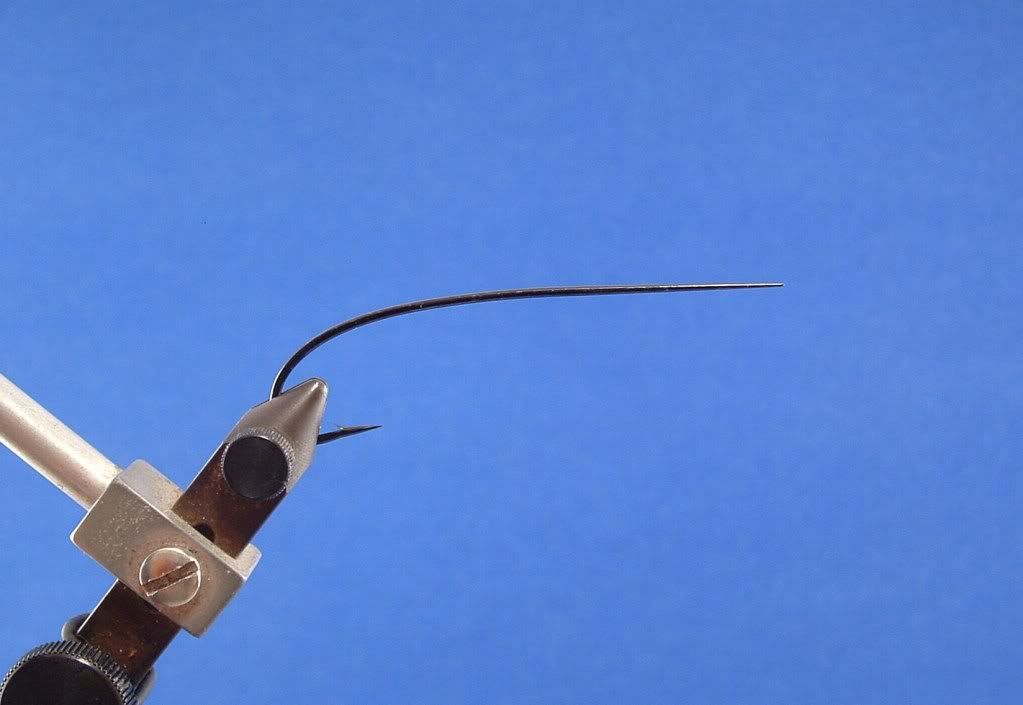
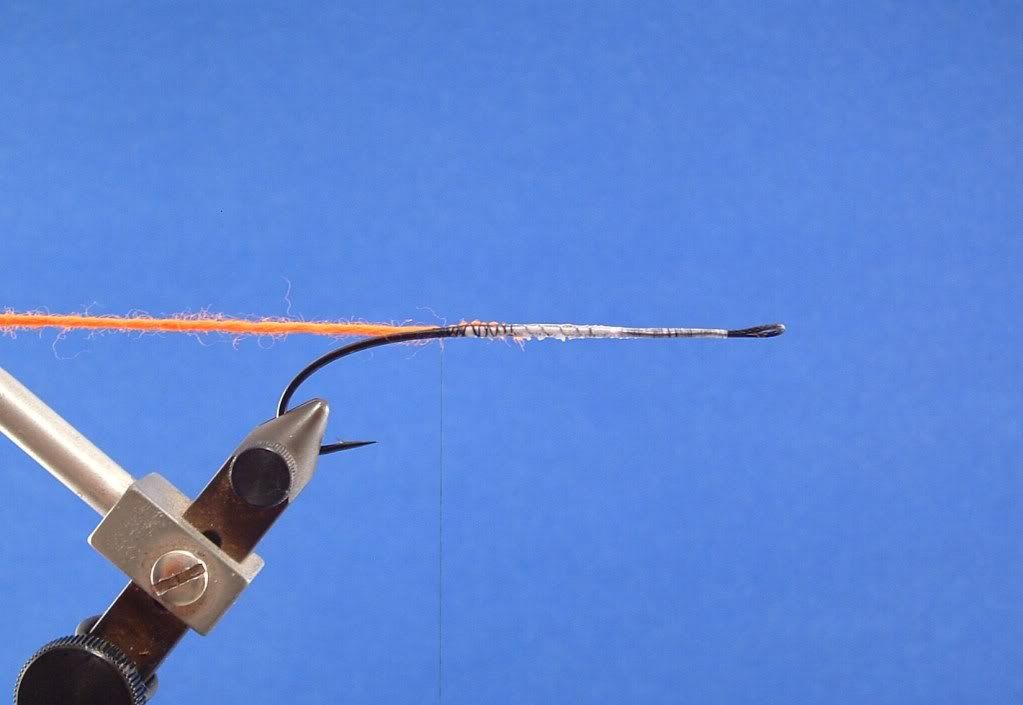
Step 1: Put the hook in the vise and attach the thread. I like using white thread to attach the silk gut or dacron for the loop eye. After the loop eye is secured I switch to black thread and the white base acts as a nice background.
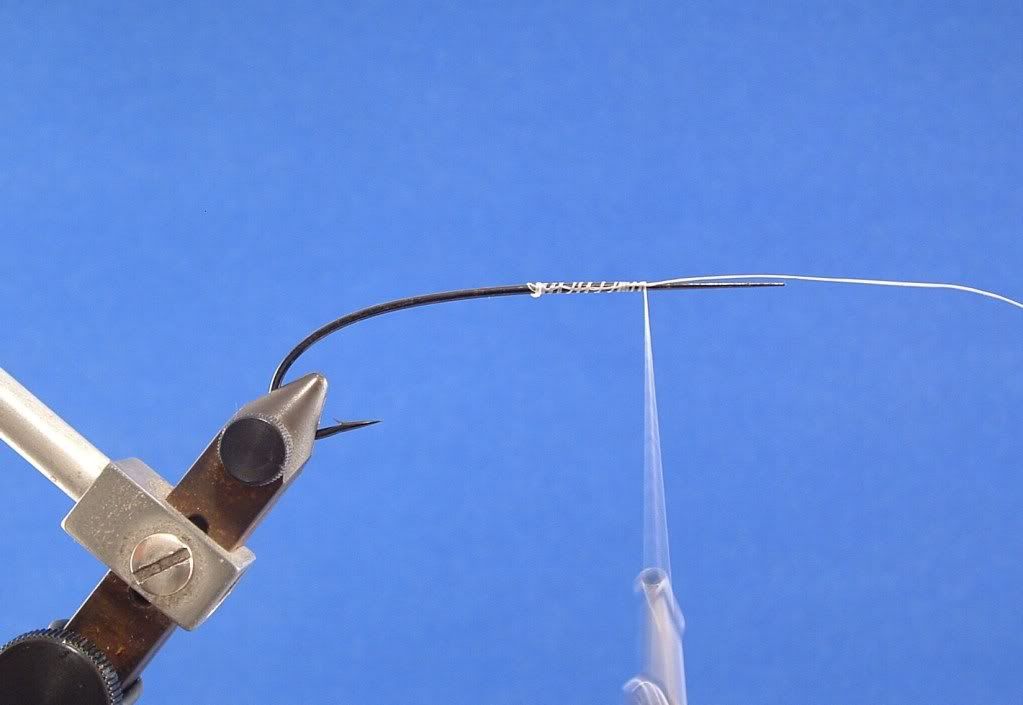
Step 2: Since I plan on fishing this fly I am going to use 30lb. braided dacron backing for the loop eye. For Spey flies and Dee flies I prefer to attach the strands (silk gut or dacron) to the side of the hook shank rather than both on top or both on the bottom. I find it helps me create a nice surface or base to mount the wings onto.
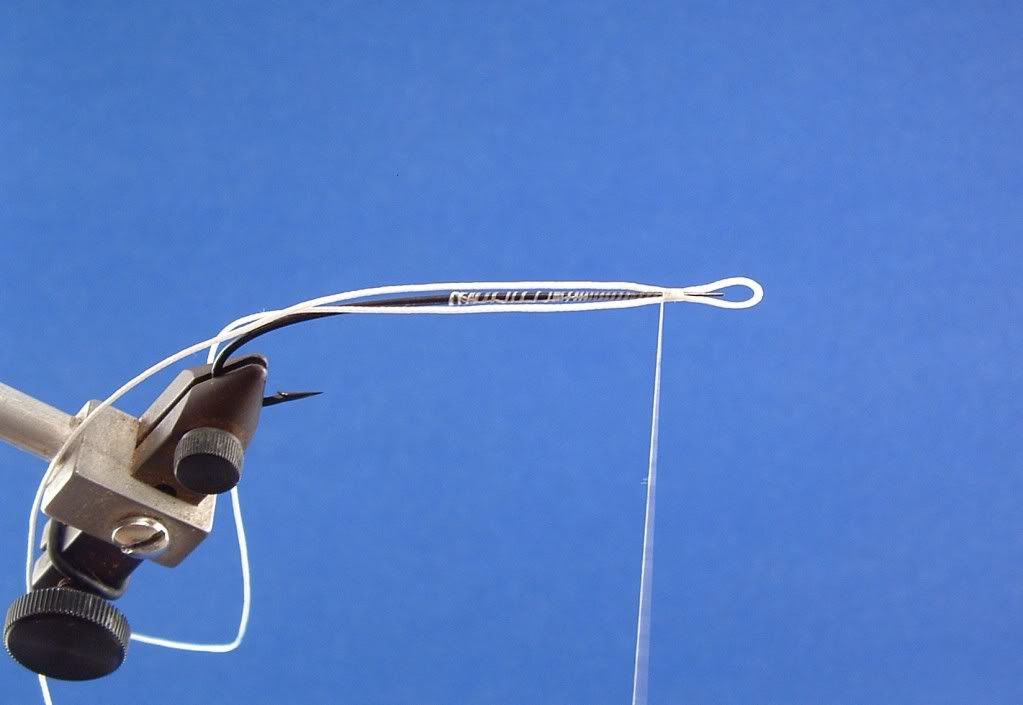
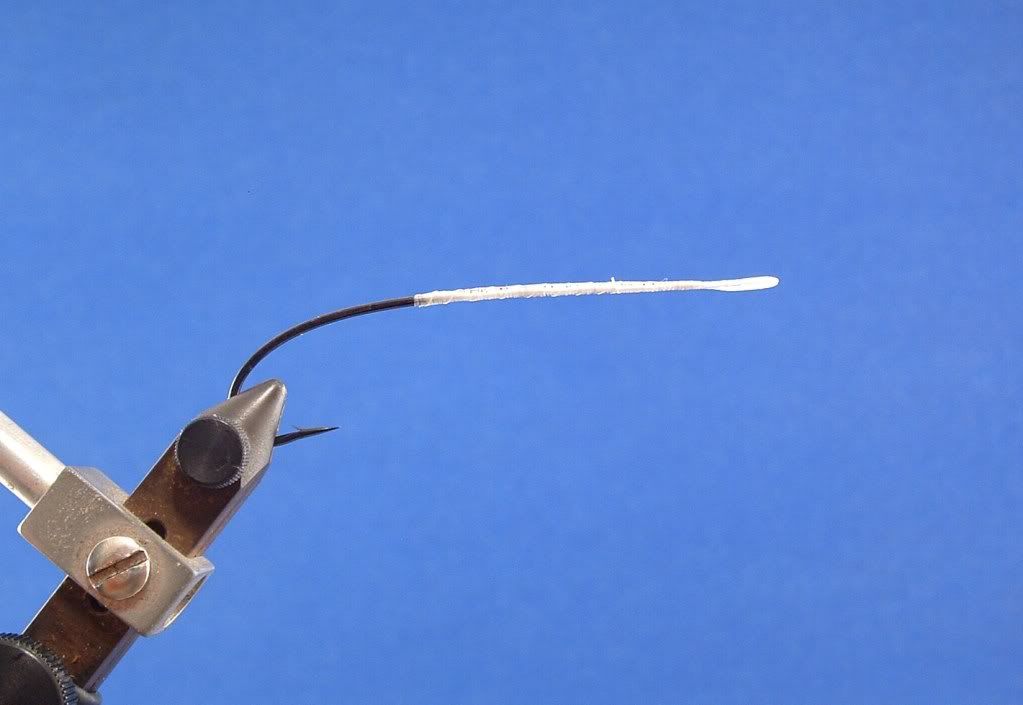
Step 3: The nice thing about using dacron for the loop eye is that it can be colored with a permanent marker......I chose to use black as you can see, but there is nothing wrong with leaving it white.
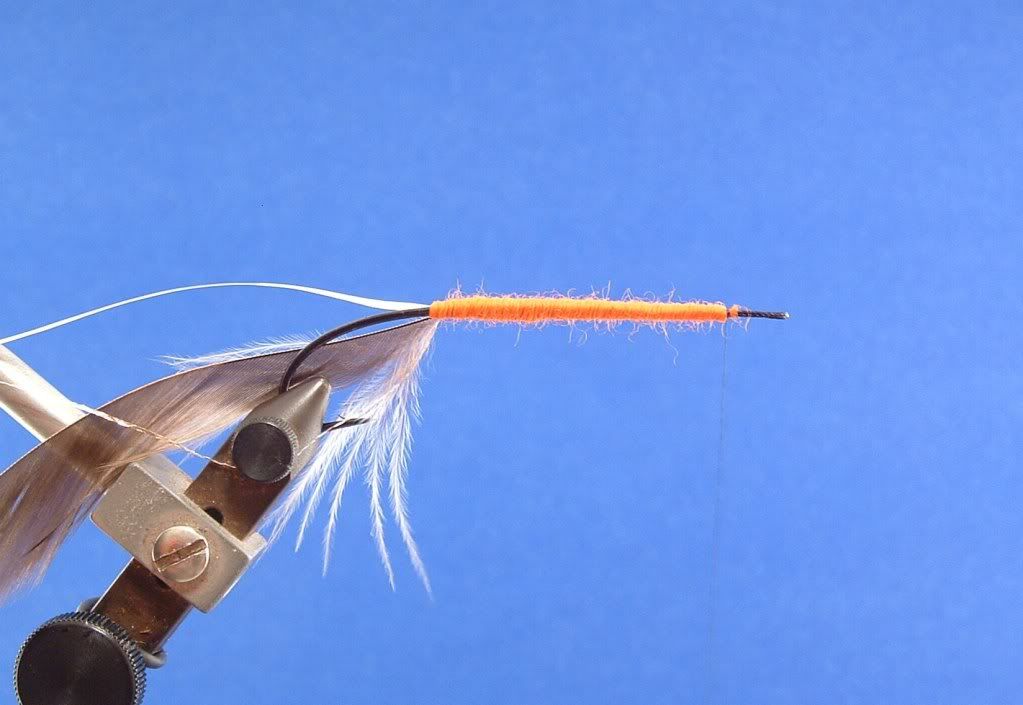
Step 4: The Berlin wool yarn I'm using for this Carron Spey is nice and fine and does not need to be seperated. Other yarns are multiple strands and need to be seperated into halves, thirds, or fourths.
Tie the wool onto the underside of the hook shank and put the excess into the material clip.
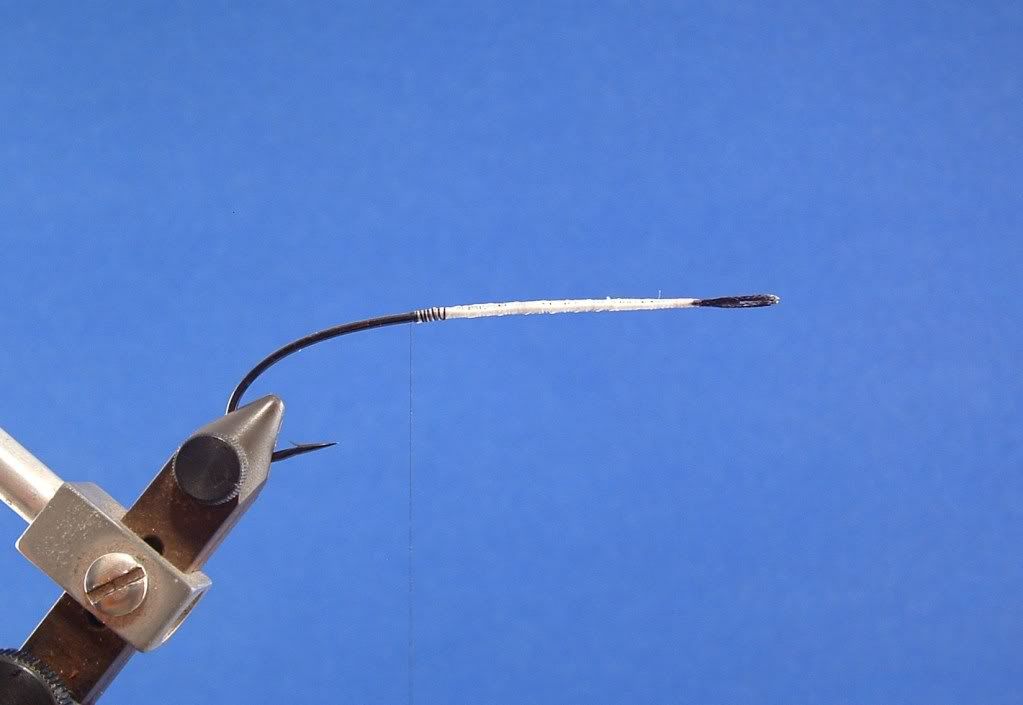
Step 5: Select a nice Schlappen feather and with the good side facing you, strip off the fibers on the left side of the stem......clean the butt end on both sides too. I try to leave some of the marabou like fibers on the stem, where the stem is thin enough to make a wrap.
Tie the schlappen onto the bottom hook shank by the butt and trim off the excess. I try to mount the stem next to the wool yarn, not on top of it to help spread out some of the bulk.
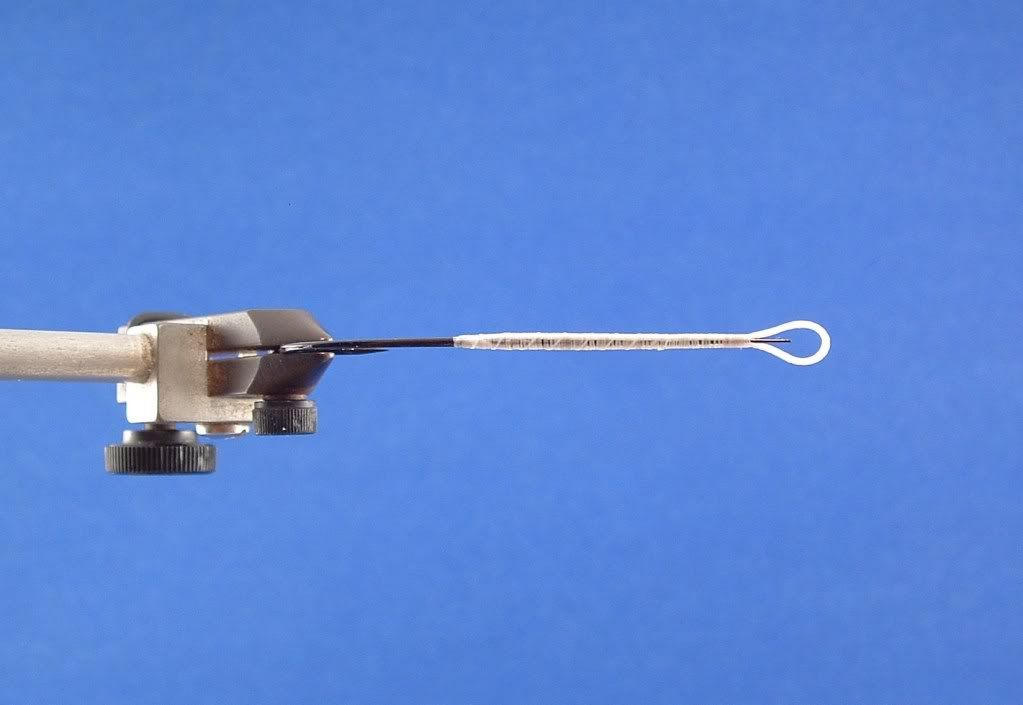
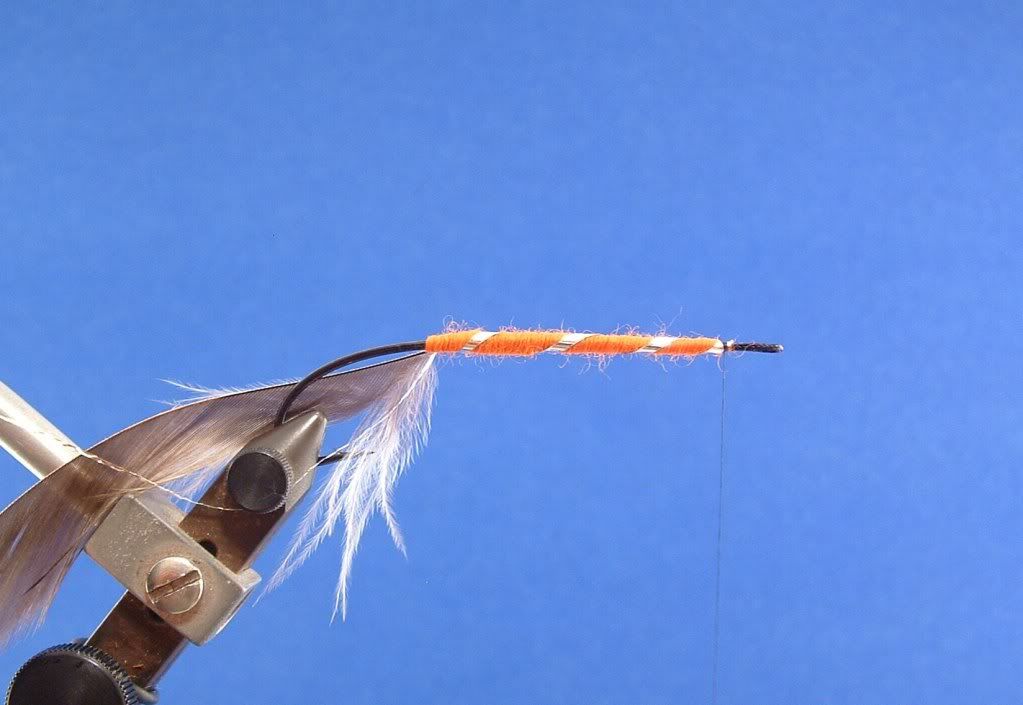
Step 6: Attach the small flat silver tinsel on to the far side of the hook shank.

Step 7: Before attaching the large flat tinsel, trim a sliver off the tip to create a taper. Metal tinsel has a tendency to kink on the first wrap and this taper helps to stop that from happening.
Attach the large flat tinsel to the far side of the hook shank, but space it about 1 turn of wool yarn, ahead of the small tinsel. This will help keep the ribbings equally spaced rather than spiralling out from a central location.
Step 8: Grab the Berliin wool yarn and unspin it slightly so it will lay flat when the first wrap is made. Make the first wrap behind all the material, the next wrap will be beween the small tinsel and the large tinsel. Now your home free....continue the body and stop short of the eye. Trim off the excess yarn.
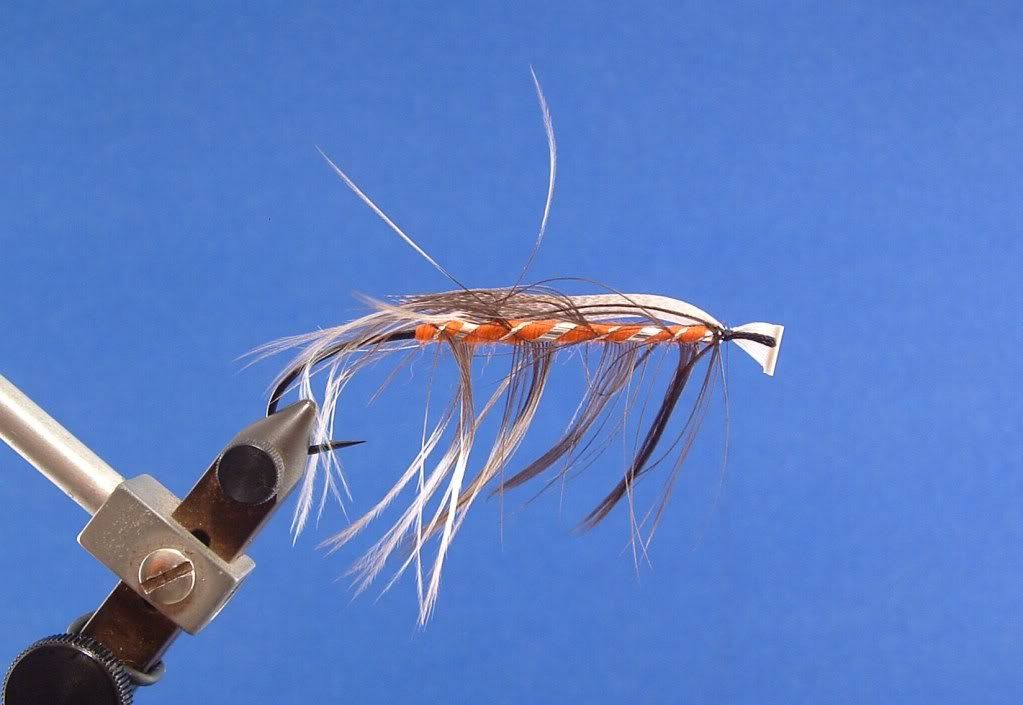
Step 9: Make three equal turns of ribbing with the large flat tinsel, unwrap your thread 1 or 2 turns, then tie off on the far side or underside of the hook shank. Trim off excess.
Step 10: Since I will be wrapping the schlappen in the opposite direction of the ribbing, I make about 6 extra turns of thread of over the butt end of the tinsel. When using the rotary function of the vice to space the wraps of hackle evenly, the thread unwinds itself........then like a spring the tinsel can come undone.
Take the schlappen and wrap it in the opposite direction as the ribbing so as to cross over it on each turn. I try to get the stem to cross over the tinsel directly on top of the hook shank and directly on the bottom of the hook shank to help keep the spacing even. Make one or two extra turns of schlappen at the eye, unwrap the thread 1 or 2 times then tie off and trim excess.
Step 11: Take the small tinsel and try to make the ribs centered in between the large flat tinsel. As I cross the stem of the schlappen I use a bodkin to precisely seperate the fibers so they are not trapped under the tinsel.
Unwrap the thread 1 or 2 times then tie off the tinsel and trim the excess.
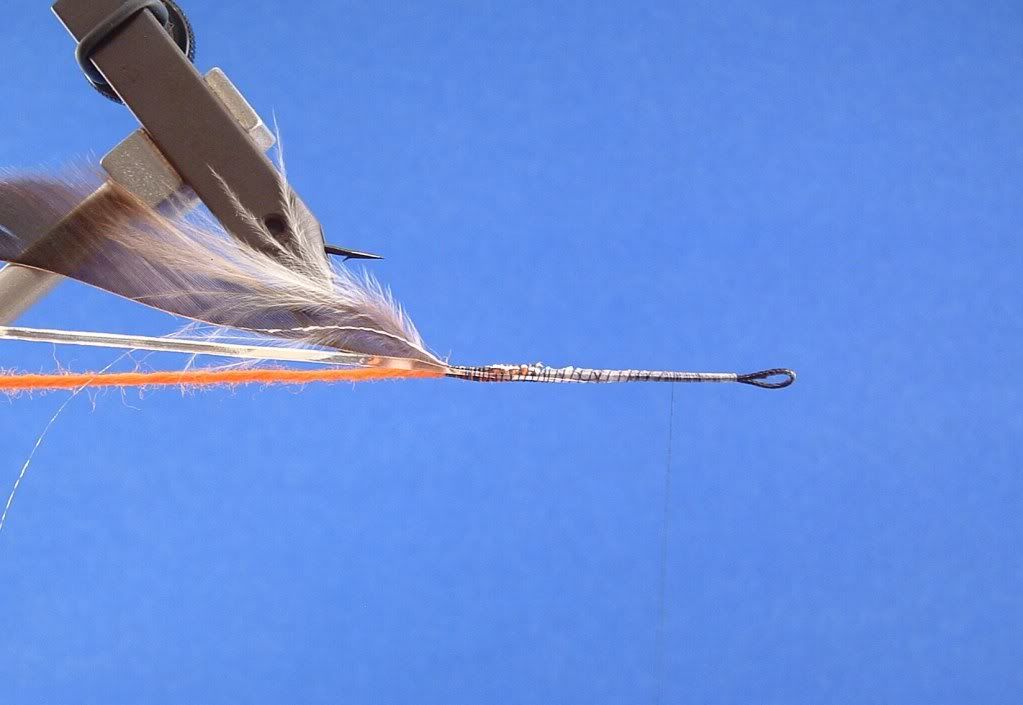
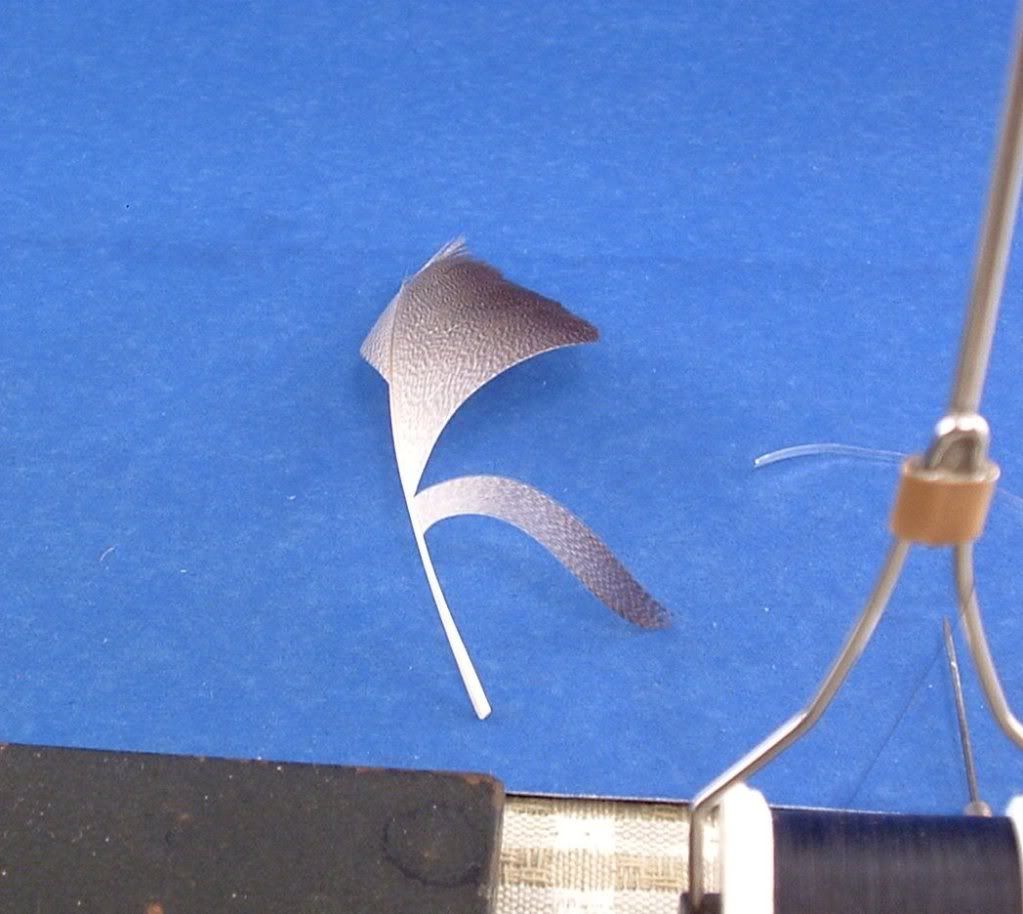
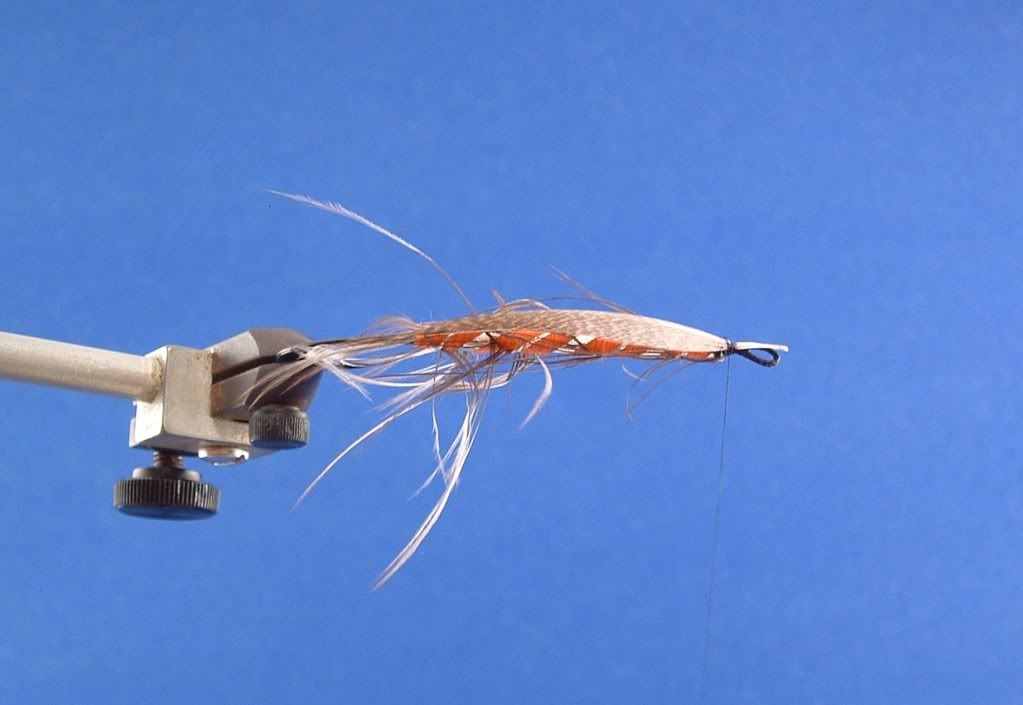
Step 12: Select a matched pair of Bronze Mallard feathers and pull off all of the fuzzy filoplume on the bottom of the stem. The feather on the right will be used for the left wing or far wing and vice versa for the other feather .
For spey fly wings, the lower half of a Bronze Mallard feather is the useable portion. The “gray” area of the fibers close to the stem are softer, which makes this portion of the fibers easier to tie on to the hook shank. The fibers in the gray area also have more barbules that help hold themselves together like hook and loop Velcro closure. You will only get 3 pairs of wings at the most from one feather, and that would be a large feather.
Separate about 10-15 fibers on each feather (less than a ¼” and greater than 1/8”) with the tip of your scissors or bodkin. Fold the fibers downward in an un-natural position as in the photo. This is how the wings will be tied in. They are not to be put back into their natural position. (this is only one of a few ways to mount spey wings)
It is very important to have the same amount of fibers in each wing. To do this, hold the feathers side by side and line up the selected fibers. If I have more or less on one of the wings I either separate or add another fiber or two to the wing. Once the wings are sized to your liking, snip off the stem leaving the fibers attached. Do not peel the fibers off the stem. By leaving the fibers on the stem, the wings are more mallable and can be shaped to achieve a nice wing. If the wings are not tied in right the first time, the stem allows for a few extra tries since the fibers are still aligned.
Step 12: Before mounting the far wing first I reverse the direction of my turns of thread. I do this by using a bodkin to hold a loop of thread, wrap the thread in the opposite direction making sure to go over the previous wraps of thread, make sure it is secure and trim of the thread loop.
I also like to trim some of the fibers on top of the hook shank, right at the wing tie in point. Moistening the rest of the fibers and pulling them down, underneath the hook shank, will help keep them out of the way while mounting the wings.
Hold the wing in position on the far side of the shank and make two loose turns of thread to gather and control the wing. Make sure that the fibers do not roll or turn up on their self because they won’t stay “married” to the other fibers.
Use your thumbnail, scissor tips, or tweezer tips to adjust the position of the wing and to compress the fibers together. When the fibers are compressed together it helps keep them married during and after use. This will take some time to get right and numerous flies so be prepared to be frustrated.
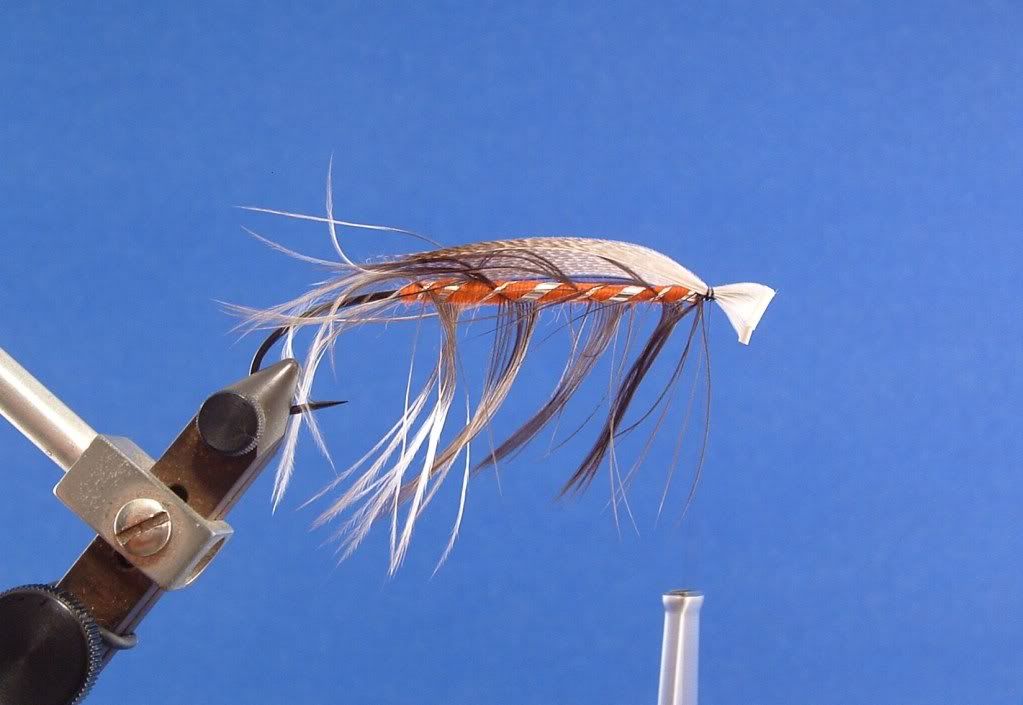
Step 13: The thread will have to be reversed again in order to tie the near wing so repeat the beginning of Step 12.
Instead of making the thread wraps on top of the spot where the feather was just in, wrap them in front of the head and underneath the butt end of the wing. Make three wraps to secure the thread and place the next turn on top of the tie in spot. This helps reduce bulk at the tie in spot and helps with a nice smooth transition between wings. Trim away the tag ends and grab the right wing. Repeat Step 12.
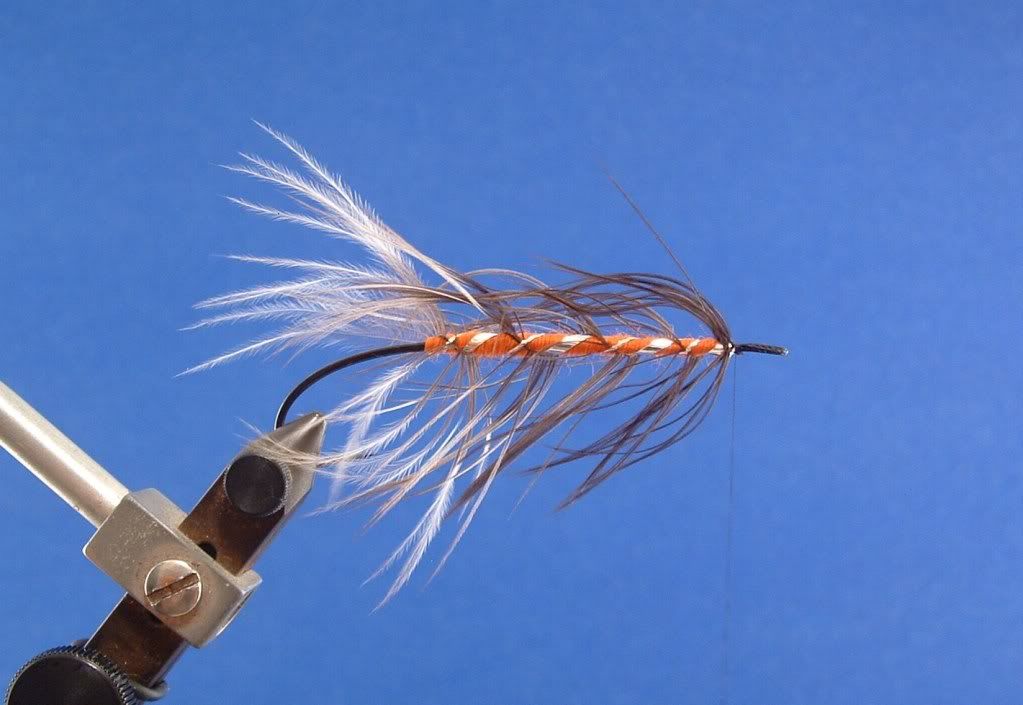
Step 14:
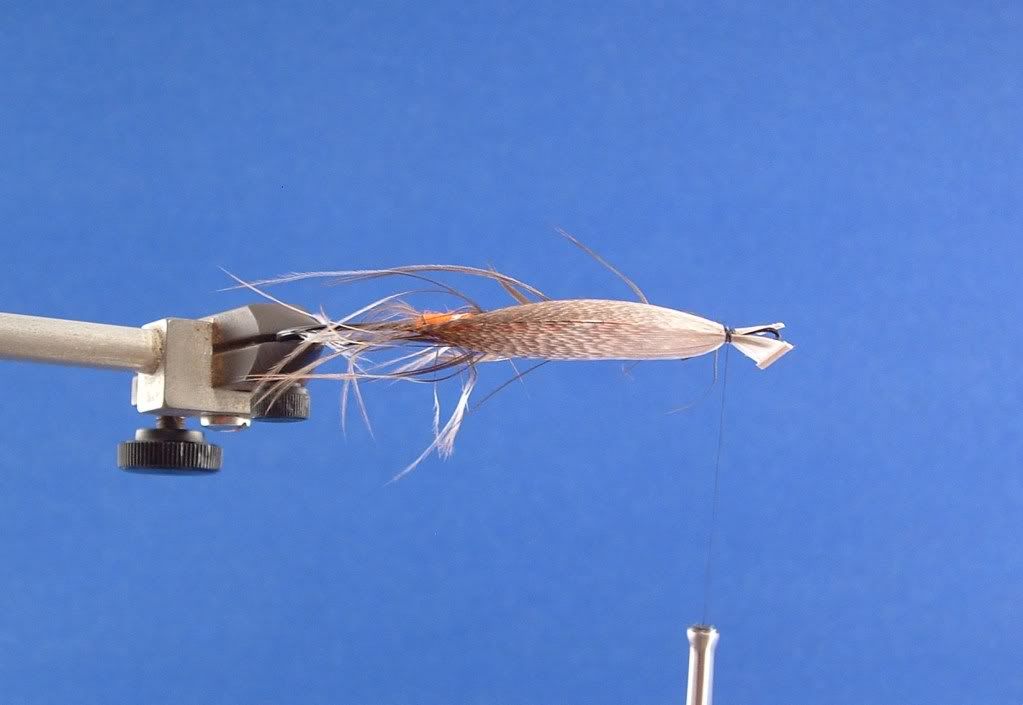
After the near wing is secured, let the bobbin hang and grab your choice of head cement. Place a good drop of cement on the wings ahead of the tie in spot. The cement should be on the part of the wings that will be trimmed, not on the finished wings. A little can be place on the thread but don’t get any on the finished wings.
The cement helps to hold the fibers together while trimming them. If they aren’t cemented, the individual fibers can move and the wing will get screwed up.
Let the cement dry for a few minutes and trim the excess fibers with the sharpest scissors you have. It takes a few cuts or snips to trim the excess.
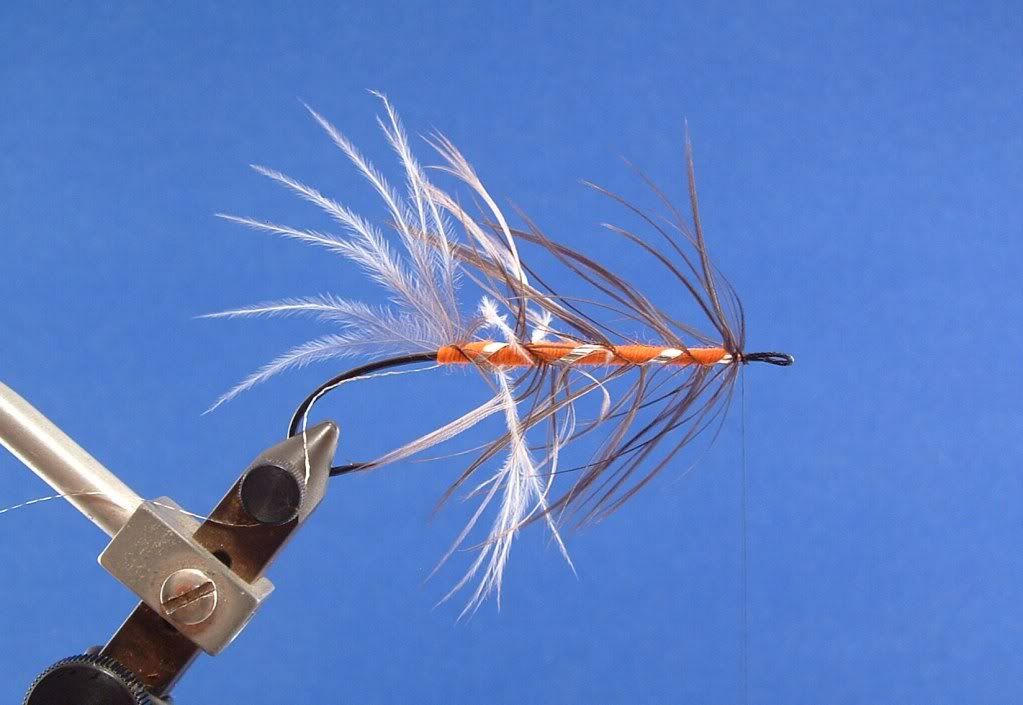
Finish the head with some additional thread wraps making sure to cover everything neatly. Add a few coats of head cement to complete the fly.
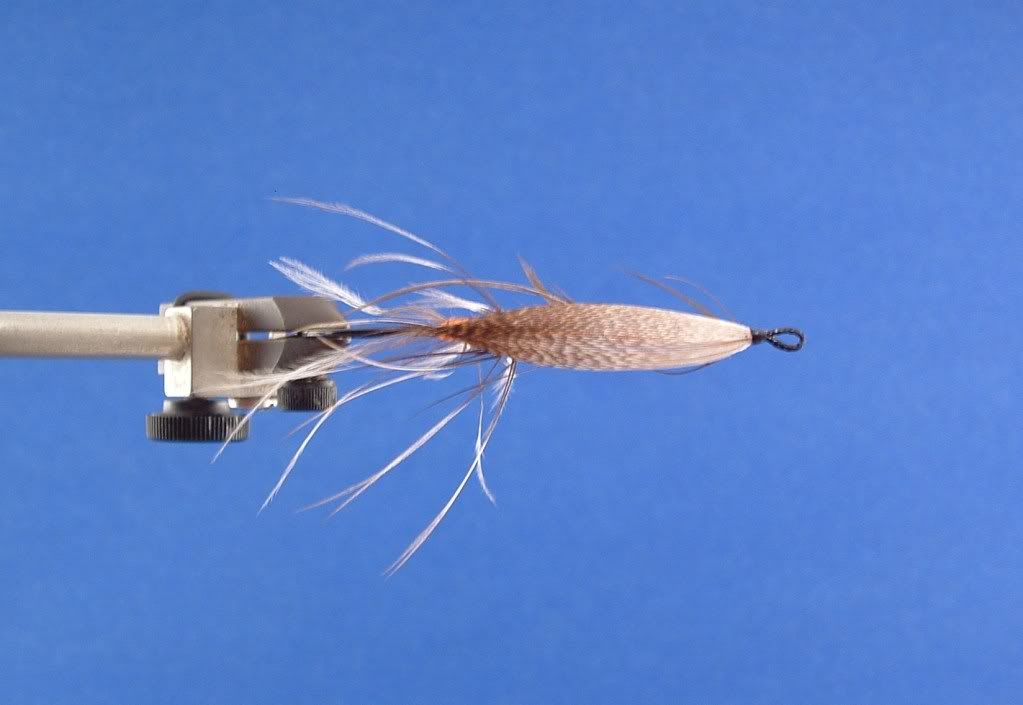
These wings strips were closer to 1/8" wide and are sitting a little high on the body for my liking......definitely not a show fly. The water will help push the wings down when it is fished however. Play with different wing thicknesses to see what works best for you.