
Post by Nick Pionessa on Jun 29, 2010 8:43:49 GMT -5
BUNNY SPEY BLACK
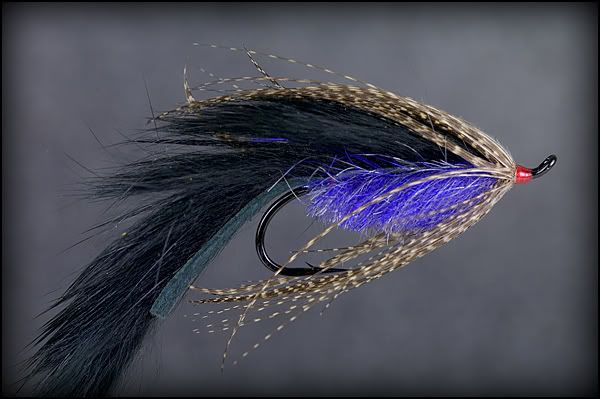
HOOK- DAIICHI 2441 #4
THREAD- GSP 50 RED
WING- BLACK RABBIT STRIP
BODY- SLF SILVER PURPLE
HACKLE- GADWALL FLANK
BUNNY SPEY WHITE
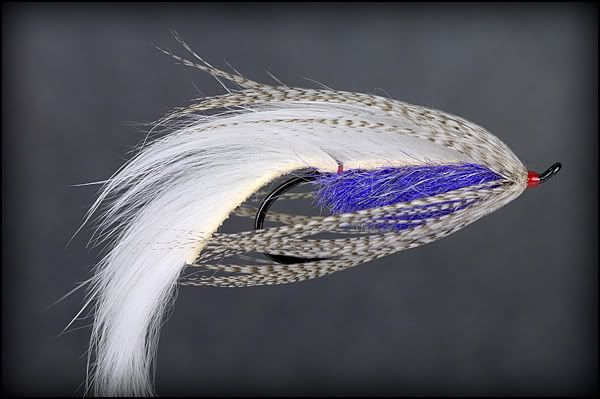
HOOK- DAIICHI 2441 #4
THREAD- GSP 50 RED
WING- WHITE RABBIT STRIP
BODY- SLF SILVER PURPLE
HACKLE- MALLARD FLANK
This is probably one of the most well know Great Lakes steelhead flies. Originated by Rick Kustich and this is a variation on the original. The white version is a personal favorite and if asked to use only one fly for Steelhead in this area it would be the top choice. Color combinations are endless and it is also a great general baitfish imitation that has proven itself on many other species.
STEP 1
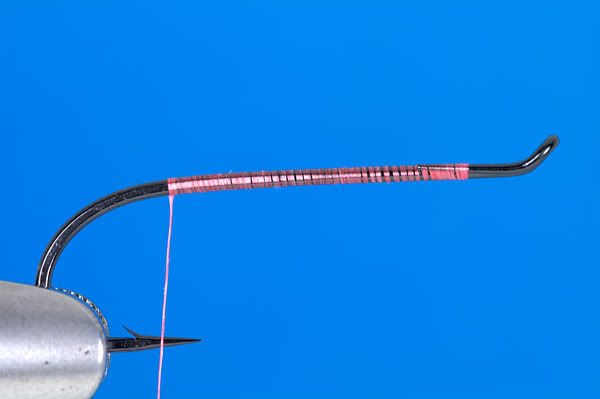
Start the thread half way up the return wire and wrap it back to the bend. Spin the bobbin to tighten up the thread.
STEP 2
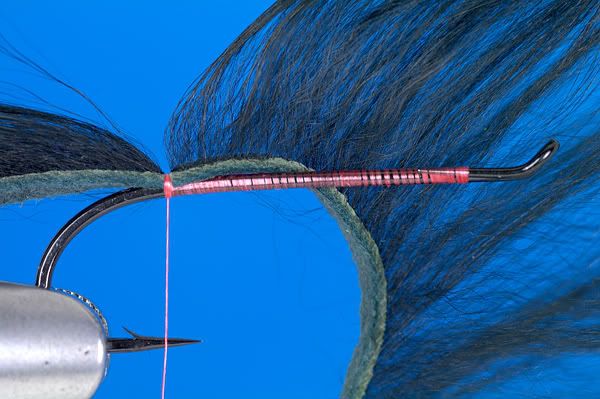
Divide the hair on a zonker strip to avoid trapping down any hair and wrap it down securely with at least 6 turns of thread keeping solid tension on the thread the whole time.
STEP 3
While keeping the tension on the thread bring it in front of the rabbit strip and wrap it securely to keep the wraps on the strip tight. Advance the thread about ¼ of the shank forward.
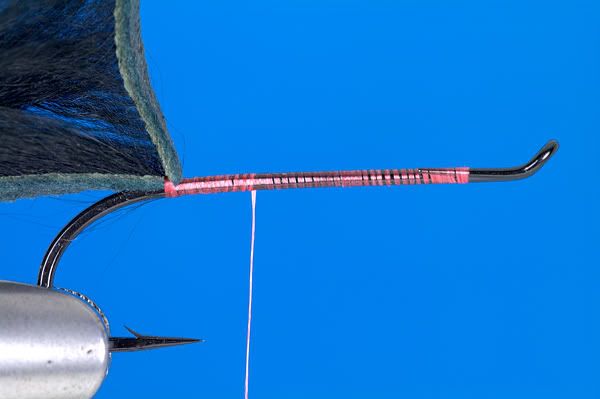
STEP 4

Make a dubbing loop at this point and wrap it back to the rabbit strip to tighten the top of the loop so it holds the dubbing better. Advance the thread to the original tie in point on the return wire. In the photo the main thread is on the right near the hook eye and the loop is on the left near the bend ready to have the dubbing put into it.
STEP 5
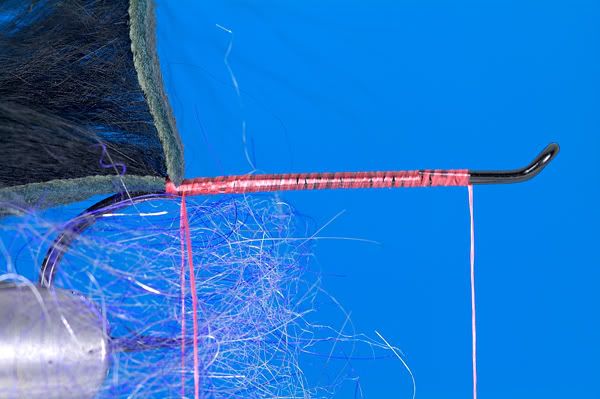
Add the dubbing to the dubbing loop by placing it between the two strands of thread. Getting the dubbing very thin and wide in the thread will ensure you can achieve the full body that completes the minnow shape of this fly when wet.
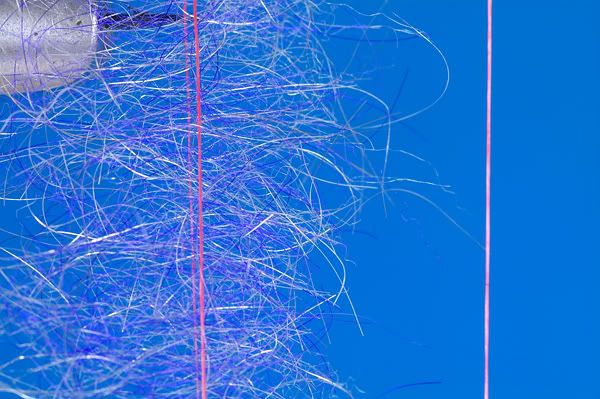
This photo shows the way the dubbing should look in the loop before it is spun. It is quite sparse and as evenly distributed as possible. The length of the dubbing fibers should be equal on both sides of the thread and when the loop is spun it will be pinched between the strands of thread and loose on the ends. You will essentially be making a chenille strand with thread and dubbing.
STEP 6
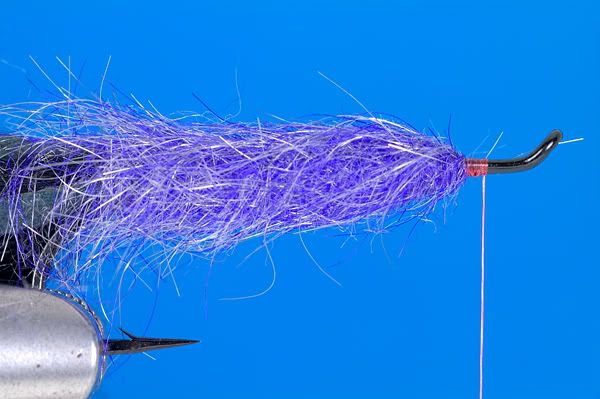
Spin the loop until it is as tight as the thread will allow. Brush the tightened dubbing rope with a piece of Velcro to loosen the ends of the fibers and free them. Now wrap the dubbing rope forward in tight turns making sure to brush back the fibers from the previous turn with each wrap. It will still end up somewhat tight and cylindrical at this point.
STEP 7
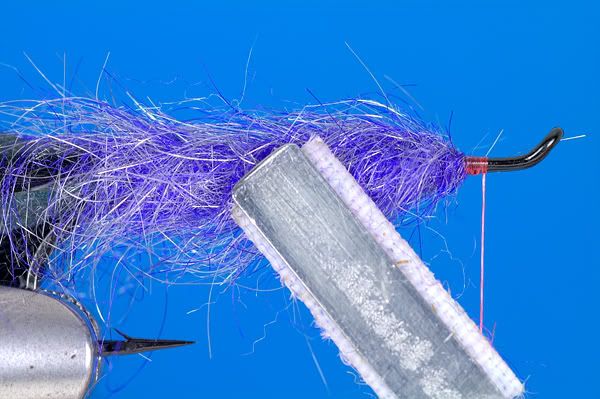
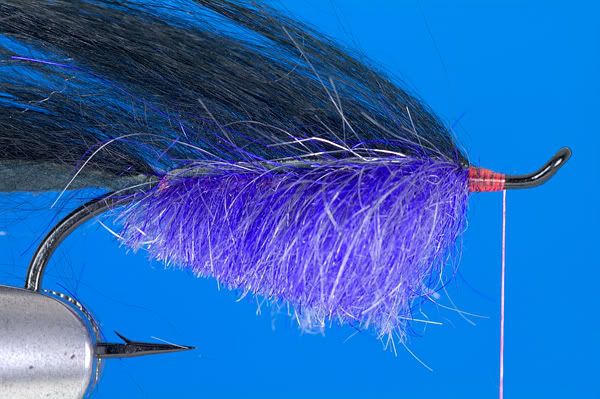
Brush the dubbing again vigorously with the Velcro until it is all loose and full around the hook shank.
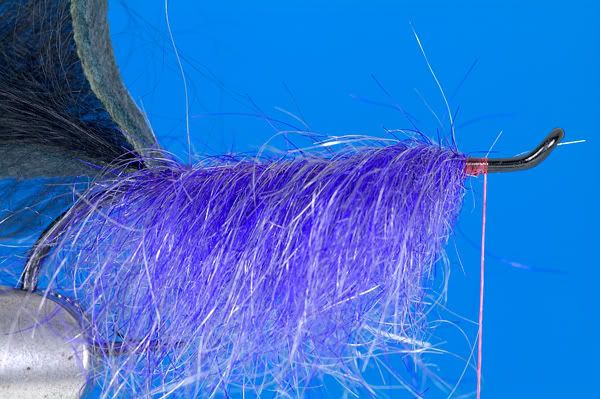
When it is all loose and full and part it down the top of the hook shank to make the top flat for where the wing will lay across the body. You should be able to see the thread on top of the shank when complete and all the dubbing should be pulled down like in the photo.
STEP 8
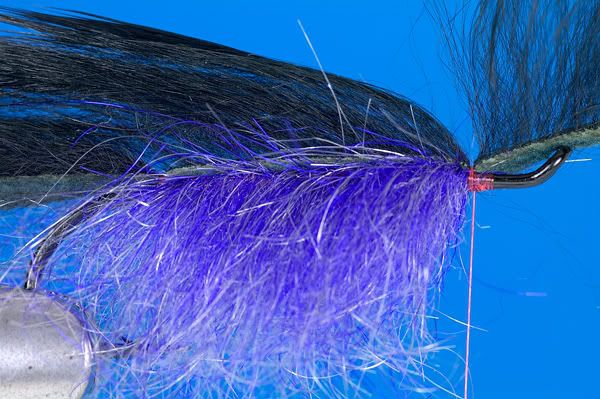
Pull the rabbit strip forward on top of the dubbed body, divide the hair and tie it down while stretching it tightly. Note that the thread is back against the front of the body and the wraps should be kept on top of each other. Six or more wraps should hold it securely.
STEP 9
Trim off the rabbit strip closely and bind the butt down as smoothly as possible to make wrapping the hackle easier. Pull the dubbing down and trim it off at the angle shown to finish off the body.
STEP 10
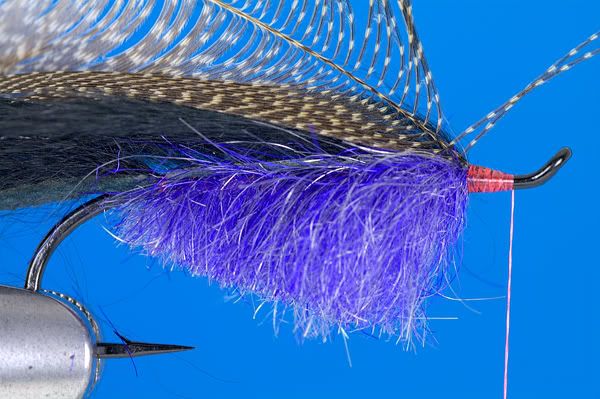
Select a Gadwall flank feather with as long of fibers as possible and tie it in by the tip on top of the hook shank. Advance the thread to just short of where the eye bends up.
STEP 11
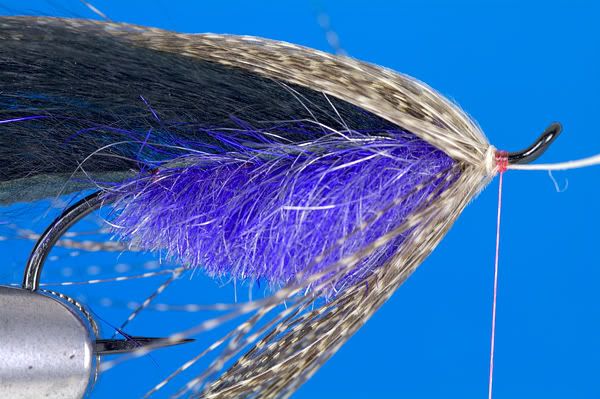
Fold and wrap the Gadwall flank feather forward until you reach the thread position and tie it off, preferably under the hook shank.
STEP 12
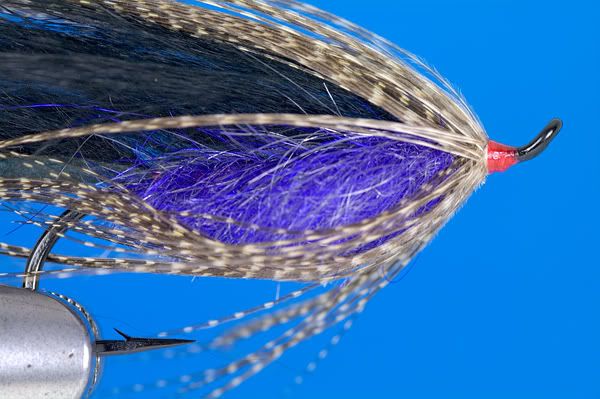
Trim off the stem closely and wrap a neat head, whip finish and coat with head cement.
HOOK- DAIICHI 2441 #4
THREAD- GSP 50 RED
WING- BLACK RABBIT STRIP
BODY- SLF SILVER PURPLE
HACKLE- GADWALL FLANK
BUNNY SPEY WHITE
HOOK- DAIICHI 2441 #4
THREAD- GSP 50 RED
WING- WHITE RABBIT STRIP
BODY- SLF SILVER PURPLE
HACKLE- MALLARD FLANK
This is probably one of the most well know Great Lakes steelhead flies. Originated by Rick Kustich and this is a variation on the original. The white version is a personal favorite and if asked to use only one fly for Steelhead in this area it would be the top choice. Color combinations are endless and it is also a great general baitfish imitation that has proven itself on many other species.
STEP 1
Start the thread half way up the return wire and wrap it back to the bend. Spin the bobbin to tighten up the thread.
STEP 2
Divide the hair on a zonker strip to avoid trapping down any hair and wrap it down securely with at least 6 turns of thread keeping solid tension on the thread the whole time.
STEP 3
While keeping the tension on the thread bring it in front of the rabbit strip and wrap it securely to keep the wraps on the strip tight. Advance the thread about ¼ of the shank forward.
STEP 4
Make a dubbing loop at this point and wrap it back to the rabbit strip to tighten the top of the loop so it holds the dubbing better. Advance the thread to the original tie in point on the return wire. In the photo the main thread is on the right near the hook eye and the loop is on the left near the bend ready to have the dubbing put into it.
STEP 5
Add the dubbing to the dubbing loop by placing it between the two strands of thread. Getting the dubbing very thin and wide in the thread will ensure you can achieve the full body that completes the minnow shape of this fly when wet.
This photo shows the way the dubbing should look in the loop before it is spun. It is quite sparse and as evenly distributed as possible. The length of the dubbing fibers should be equal on both sides of the thread and when the loop is spun it will be pinched between the strands of thread and loose on the ends. You will essentially be making a chenille strand with thread and dubbing.
STEP 6
Spin the loop until it is as tight as the thread will allow. Brush the tightened dubbing rope with a piece of Velcro to loosen the ends of the fibers and free them. Now wrap the dubbing rope forward in tight turns making sure to brush back the fibers from the previous turn with each wrap. It will still end up somewhat tight and cylindrical at this point.
STEP 7
Brush the dubbing again vigorously with the Velcro until it is all loose and full around the hook shank.
When it is all loose and full and part it down the top of the hook shank to make the top flat for where the wing will lay across the body. You should be able to see the thread on top of the shank when complete and all the dubbing should be pulled down like in the photo.
STEP 8
Pull the rabbit strip forward on top of the dubbed body, divide the hair and tie it down while stretching it tightly. Note that the thread is back against the front of the body and the wraps should be kept on top of each other. Six or more wraps should hold it securely.
STEP 9
Trim off the rabbit strip closely and bind the butt down as smoothly as possible to make wrapping the hackle easier. Pull the dubbing down and trim it off at the angle shown to finish off the body.
STEP 10
Select a Gadwall flank feather with as long of fibers as possible and tie it in by the tip on top of the hook shank. Advance the thread to just short of where the eye bends up.
STEP 11
Fold and wrap the Gadwall flank feather forward until you reach the thread position and tie it off, preferably under the hook shank.
STEP 12
Trim off the stem closely and wrap a neat head, whip finish and coat with head cement.