

Post by Frank Swarner on Feb 10, 2011 13:24:19 GMT -5
Note: The recipe I used was from Dick Stewart's and Farrow Allen's book, "Flies for Steelhead," and mentions that the tail should be tied in short, not extending beyond the hook barb.
The Bulkley River is a tributary of British Columbia's Skeena River, and is ideal water for skating a dry fly in either slick or broken water. The Bulkely Mouse was developed by a British Columbia guide, Collin Shadrech, during the late 1970's and early 1980's. It is considered the most effective type of dry fly pattern for that river. When dressed with an underwing of pearlescent flashabou it is known as a Disco Mouse.
Hook: Daichii 2421 size 4
Thread: 6/0 black
Tail: Natural Deer, Moose, or Elk body hair
Body: Butt ends of the hair used for the bound to the hook with criss cross wraps of thread
Wing: Natural Deer, Moose, or Elk body hair
Head: Flared hair from the wing clipped to form a head
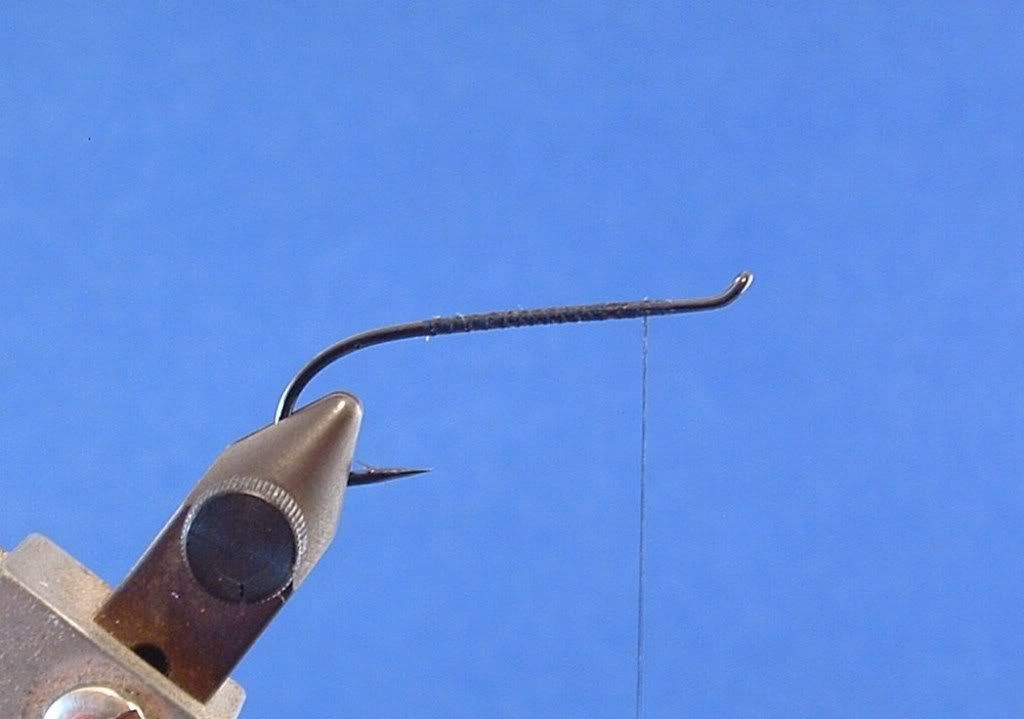
Step 1: I like to attach the thread to the hook right behind the return wire. Wrap the thread back to a point on the hook shank directly above the point of the hook and return the thread to the rear of the return wire.
Step 2: Select your preferred hair, clip it off the hide as close to the hide as you can, and while firmly pinching the tips, use a small pet comb to remove all of the underfur. Gauge the length of the tail to go just beyond the end of the bend of the hook and tie it on the shank just behind the return wire. Try to get the hair to cover all sides of the hook shank. The cool part.....compress the hair to the shank with your fingers and make evenly spaced wraps of thread and stop at the hook point.
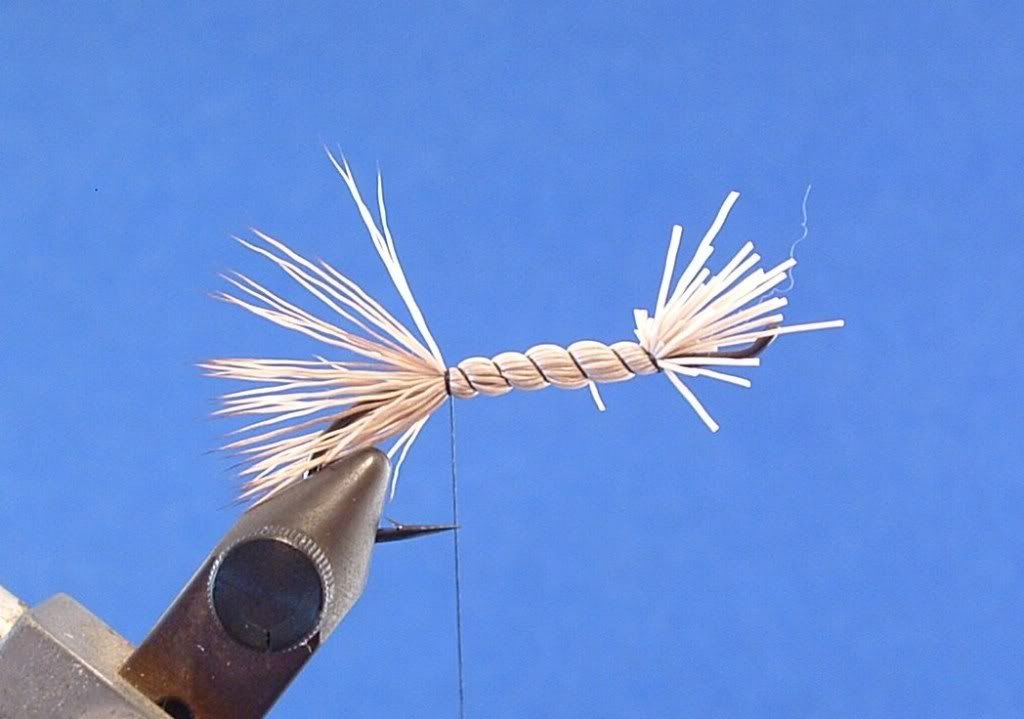
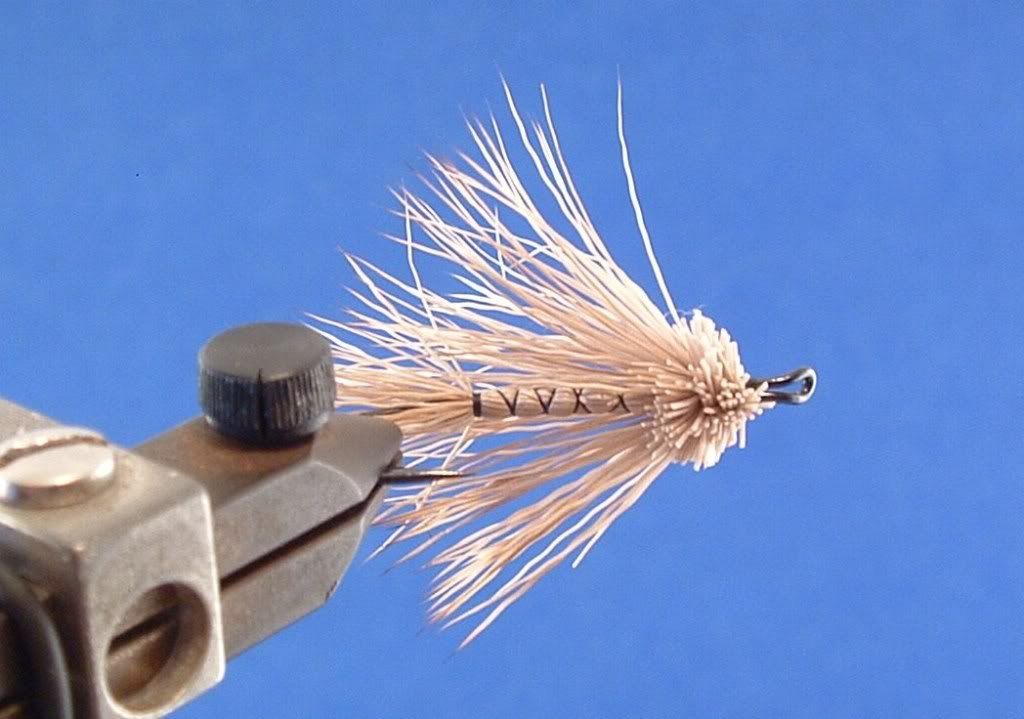
Step3: Make two extra turns at the base of the tail and spiral the thread wraps forward criss crossing the previous wraps. This will give the fly a segmented look. It's up to you if you want to coat the body and thread wraps with a flexible adhesive.
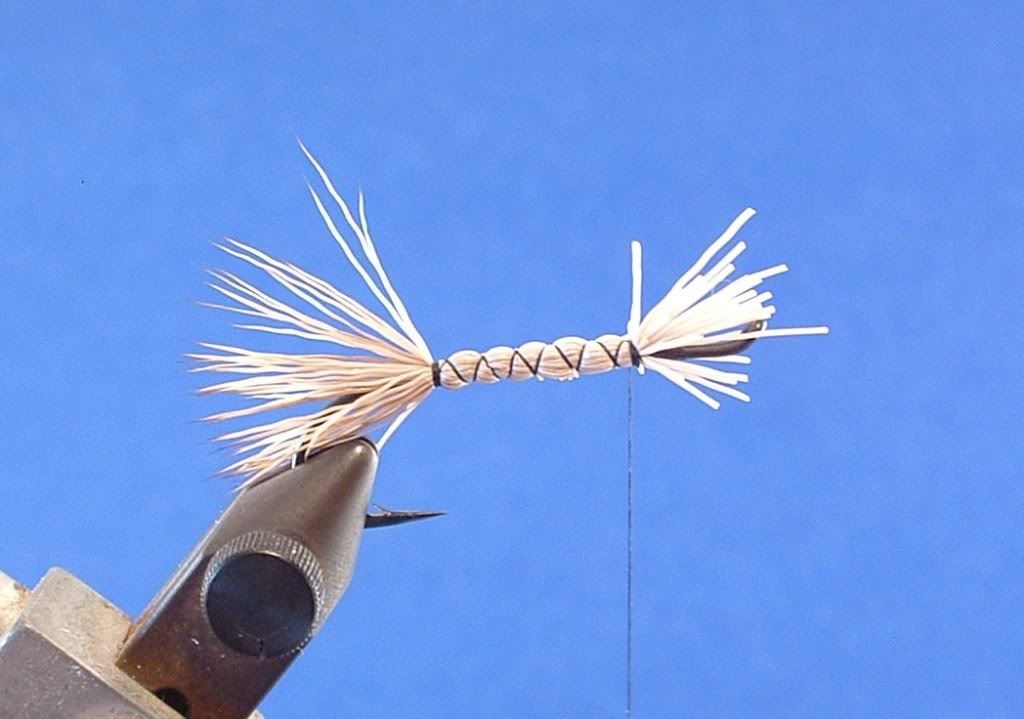
Step 4: Trim off the butt ends at the return wire or do so slightly past if you don't want to leave as much room in front of the head like I did. It's for a riffle hitch dad........not with that much room son. Darn. minus 1 attaboy.
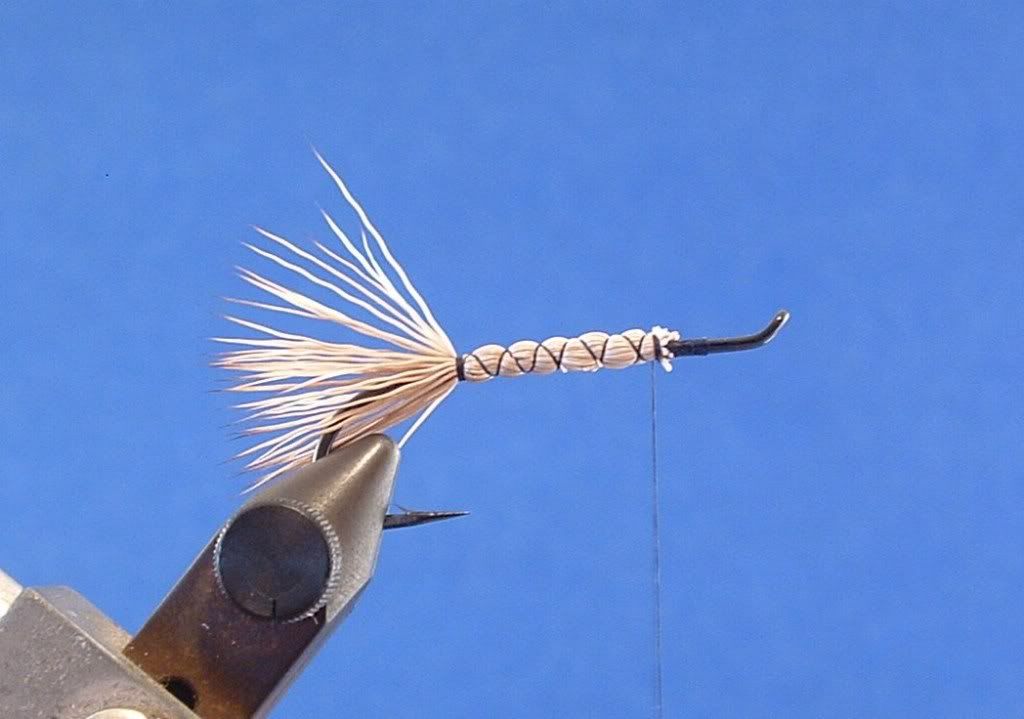
Step 5: Select matching hair, and as in Step 2 clip it off the hide as close to the hide as you can, and while firmly pinching the tips, use a small pet comb to remove all of the underfur. Measure the wing so it extends to the rear of the hook and clip the butt ends while in your fingers so they are shorter than the wing tips when flared. When you slide scissors over the tips after they are tied in, the butt ends will stand up and make trimming them to shape much easier. Tie the hair on top of the hook shank and let it roll over to the far side and slightly under the hook shank.
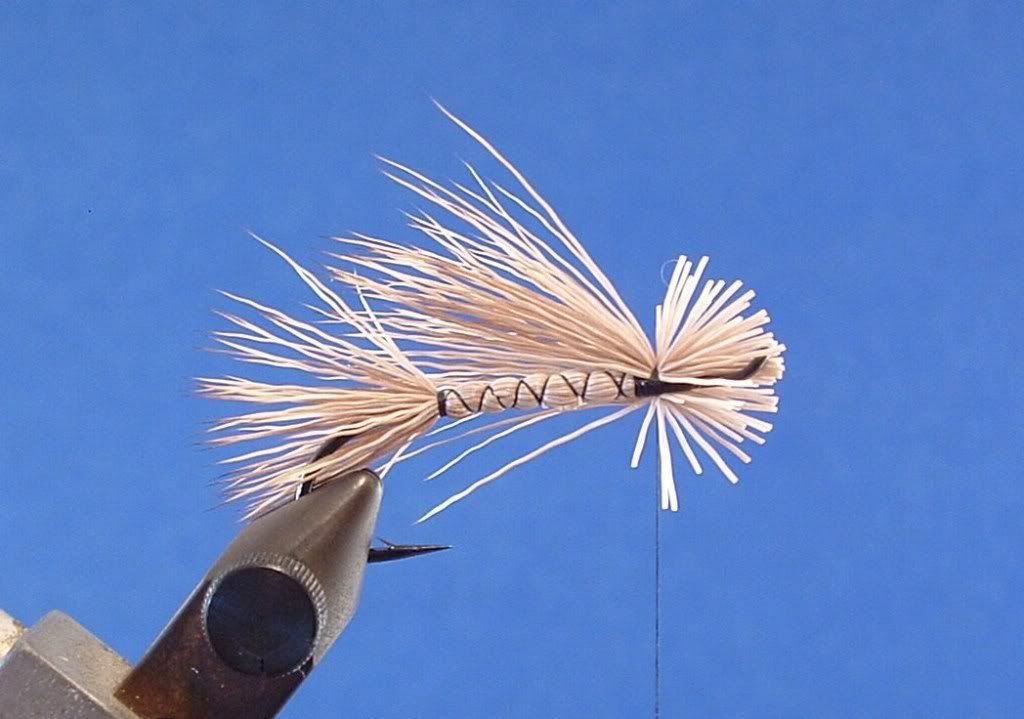
Step 6: Repeat step 5, but tie the material in on the bottom of the hook shank where the previous material thins out, and let it roll and flare back to the top of the hook shank. Make another two firm wraps to bind the material tighter to the shank.
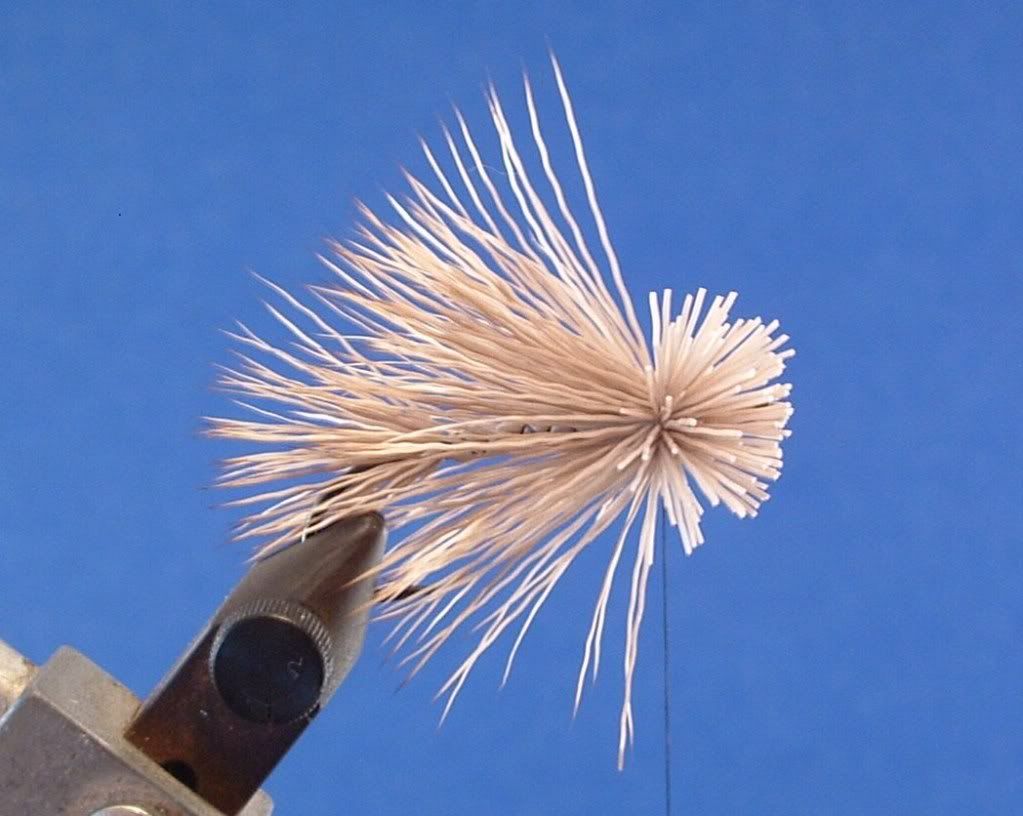
Step 7: I should have tied in another small clump to take up some shank but oh well. Begin to trim the but ends of the wings and start to get them to a round shape. Not like a round ball, but like a round cylindar.
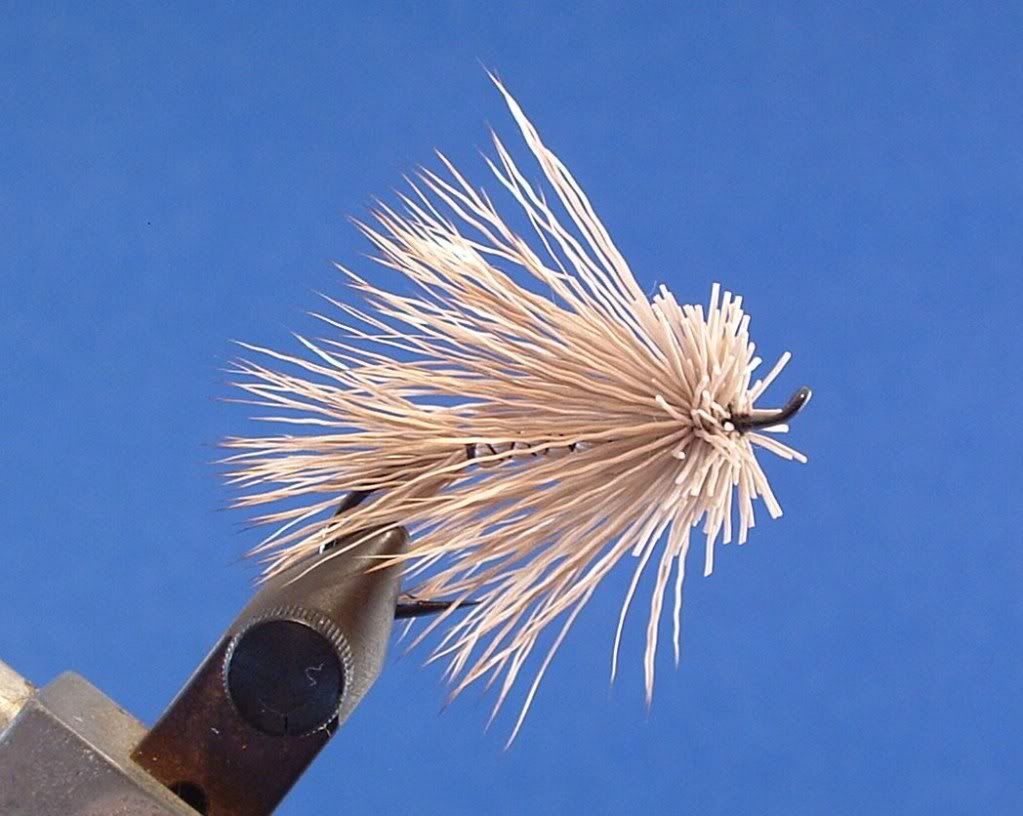
Step 8: Start forming the head. I chose to trim some of the hair on the bottom of the hook shank to help expose the body a tad more, but the hair on the bottom can remain intact if you like.
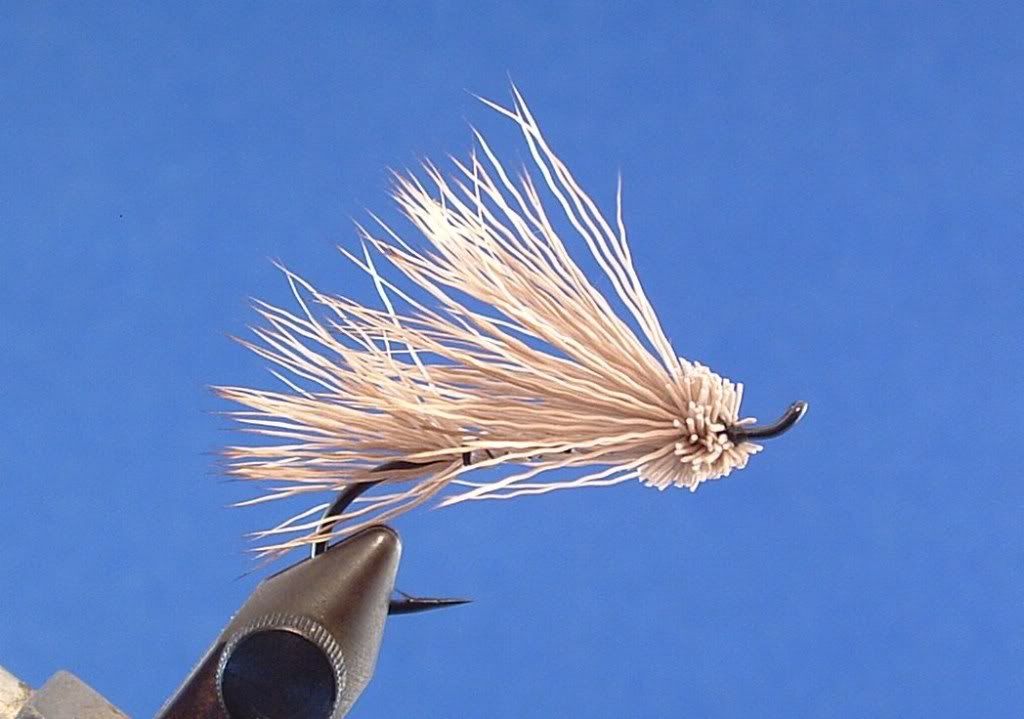
Shot of the bottom of the fly.
The Bulkley River is a tributary of British Columbia's Skeena River, and is ideal water for skating a dry fly in either slick or broken water. The Bulkely Mouse was developed by a British Columbia guide, Collin Shadrech, during the late 1970's and early 1980's. It is considered the most effective type of dry fly pattern for that river. When dressed with an underwing of pearlescent flashabou it is known as a Disco Mouse.
Hook: Daichii 2421 size 4
Thread: 6/0 black
Tail: Natural Deer, Moose, or Elk body hair
Body: Butt ends of the hair used for the bound to the hook with criss cross wraps of thread
Wing: Natural Deer, Moose, or Elk body hair
Head: Flared hair from the wing clipped to form a head
Step 1: I like to attach the thread to the hook right behind the return wire. Wrap the thread back to a point on the hook shank directly above the point of the hook and return the thread to the rear of the return wire.
Step 2: Select your preferred hair, clip it off the hide as close to the hide as you can, and while firmly pinching the tips, use a small pet comb to remove all of the underfur. Gauge the length of the tail to go just beyond the end of the bend of the hook and tie it on the shank just behind the return wire. Try to get the hair to cover all sides of the hook shank. The cool part.....compress the hair to the shank with your fingers and make evenly spaced wraps of thread and stop at the hook point.
Step3: Make two extra turns at the base of the tail and spiral the thread wraps forward criss crossing the previous wraps. This will give the fly a segmented look. It's up to you if you want to coat the body and thread wraps with a flexible adhesive.
Step 4: Trim off the butt ends at the return wire or do so slightly past if you don't want to leave as much room in front of the head like I did. It's for a riffle hitch dad........not with that much room son. Darn. minus 1 attaboy.
Step 5: Select matching hair, and as in Step 2 clip it off the hide as close to the hide as you can, and while firmly pinching the tips, use a small pet comb to remove all of the underfur. Measure the wing so it extends to the rear of the hook and clip the butt ends while in your fingers so they are shorter than the wing tips when flared. When you slide scissors over the tips after they are tied in, the butt ends will stand up and make trimming them to shape much easier. Tie the hair on top of the hook shank and let it roll over to the far side and slightly under the hook shank.
Step 6: Repeat step 5, but tie the material in on the bottom of the hook shank where the previous material thins out, and let it roll and flare back to the top of the hook shank. Make another two firm wraps to bind the material tighter to the shank.
Step 7: I should have tied in another small clump to take up some shank but oh well. Begin to trim the but ends of the wings and start to get them to a round shape. Not like a round ball, but like a round cylindar.
Step 8: Start forming the head. I chose to trim some of the hair on the bottom of the hook shank to help expose the body a tad more, but the hair on the bottom can remain intact if you like.
Shot of the bottom of the fly.